Chromebook to Bookwormbook
Replace ChromeOS with Debian 12 aka "Bookworm" on the Acer C720 Chromebook and restore it to service as a home server.
Let's go!

Ten years ago I purchased the C720, and quickly replaced the stock OS with a succession of Linux distros before settling on Debian.
Running a full-featured Linux on this little laptop was a delight: lightweight, several hours battery life, inexpensive, and snappy performance. I used it as my primary laptop for a few years before switching to a refurbished Thinkpad X230.
This particular model chromebook was available in a few different configurations. Mine is the non-touchscreen model C720-2848 with an Intel Celeron 2955U processor, soldered 2GB RAM, and a user-replaceable 16GB SSD (which I swapped out for 256GB storage).
It hasn't seen any use for several years, and the small amount of fixed RAM in these older chromebooks somewhat limit their usefulness as a desktop.
But how about a new life as a Linux home server?
Below are my notes from several years ago about how I first prepared the C720 Chromebook before installing Linux, with a link to updated instructions for the install and basic setup of the latest stable release of Debian.
Onward!
1. Recovery Image
Note: Newer/different models of chromebooks may differ significantly in how one would go about replacing ChromeOS with Debian.
Create a recovery image (my C720 is model PEPPY C6A-N3C-A7O) to enable restoring the chromebook to its default configuration (requires a spare USB stick of 2GB or better):
- Log into the chromebook and let it auto-update, as there sometimes are firmware updates. Check the updating status in the browser at
chrome://help. - Insert the USB stick, enter
chrome://imageburnerand follow the directions to generate a recovery image.
2. SeaBIOS
SeaBIOS in combination with Coreboot provides an open-source legacy BIOS that enables access to the MBR and the ability to install an alternative OS on the chromebook.
All this good stuff involves jumping through a few simple hoops and not trembling in fear at the "scary white screen" that pops up at power up stating that the boot loader detects something is very very wrong with the Chromebook and helpfully suggests pressing the spacebar to begin recovery.
Do not press the spacebar or the Debian installation will be wiped from disk!
There are 2 different methods for configuring SeaBIOS in preparation for installing Debian:
-
Method #1 uses a few simple commands in the ChromeOS shell to place the Chromebook into developer mode and allow booting the USB install media and replacing ChromeOS with Debian. The drawback is that scary screen appears at every boot and you must press
CTRL+Lto boot to legacy-mode and onward to GRUB and Debian (and ignore the helpful prompt to press spacebar and inadvertently begin the adventure of wiping clean the SSD). -
Method #2 involves setting new flags for the write-protected Google Binary Block (GBB) in the device firmware. Delay at the boot screen can be reduced to a one second timeout and the legacy-mode BIOS set as the system default (no key combo required). Pressing the spacebar is disabled from doing any harm to Debian (the Chromebook just beeps). The drawback is that it involves the (actually not too difficult) removal of the device's bottom cover and the temporary removal of the write-protect screw from the motherboard to permit flashing new flags to the GBB.
In the course of experimenting with alternate OS installs on the chromebook, I first employed the developer mode method followed by the write-protect screw method. I prefer the second method that defaults to legacy-mode BIOS, but I have employed both methods successfully and describe their respective steps below.
2.1 Write-Protect Screw Method
Disconnect power. Turn the Chromebook over facing bottom up and remove the 13 screws (not missing the one hidden under the warranty sticker).
Gently pry the case off starting with the seam where the display connects to device. It comes away pretty easy.
This is what you see ...
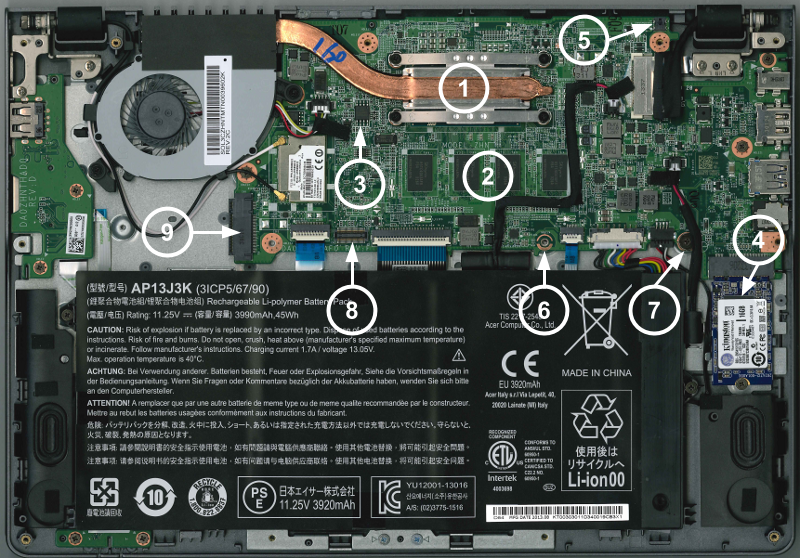
Image (courtesy of Chromium): The battery lock screw is #6 and the write-protect screw is #7.
WARNING! This will wipe out whatever is installed on the SSD:
- Remove the write-protect screw
- Close back cover using only the battery lock screw to hold in place
- Re-connect power, boot Chromebook and wait until it displays ...
ChromeOS is missing or damaged.
Please insert a recovery USB stick or SD card. - Insert USB recovery media prepared in Step 1 and it will proceed to restore ChromeOS and reboot
- At default ChromeOS "Welcome!" screen open a terminal
CTRL+ALT+F2(Right-arrow) - Login as
chronos(no password), then entersudo sufor superuser access
Set new GBB flags using the set_gbb_flags.sh script in ChromeOS.
Enable short developer mode screen (1 second timeout) followed by default legacy mode boot by using these flags ...
GBB_FLAG_DEV_SCREEN_SHORT_DELAY 0×00000001
GBB_FLAG_FORCE_DEV_SWITCH_ON 0×00000008
GBB_FLAG_FORCE_DEV_BOOT_LEGACY 0×00000080
GBB_FLAG_DEFAULT_DEV_BOOT_LEGACY 0×00000400
To set these flags, run in the shell ...
/usr/share/vboot/bin/set_gbb_flags.sh 0x489Shutdown ...
shutdown -h nowDisconnect the power, then:
- Remove the bottom cover again and reinstall the write-lock screw to protect the BIOS
- Close cover and reinstall all the case screws
Re-connect power, insert USB stick prepared in Step 1, and power up Chromebook.
Note: Whenever you remove battery power to this chromebook (when opening up the case) the hardware clock on the motherboard resets to a future year (mine travelled to 2040). If a network connection is available during the Debian install, the system will fetch a correct time from an NTP server.
2.2 Developer Mode Method
Note: Switching between developer and normal (non-developer) modes will remove user accounts and their associated information from the Chromebook.
The alternative to removing the write-protect screw above is to place the chromebook into developer mode using the ChromeOS shell before booting the USB install media:
- With the Chromebook off, hold down
ESC+F3(Refresh) keys and power on the device. - Invoke Recovery, and at the Recovery screen press
Ctrl+D. - Device will prompt for confirmation, press
ENTERand the system reboots into developer mode. - Scary white boot screen appears and you need to press
Ctrl+Dto continue boot.
Enable the USB Boot and Legacy BIOS modes by opening the shell with Ctrl+Alt+T and enter shell. Set dev_boot_usb and dev_boot_legacy to active ...
sudo crossystem dev_boot_usb=1
sudo crossystem dev_boot_legacy=1
Insert USB stick prepared in Step 1, reboot the chromebook and press CTRL+L at the boot screen to enter legacy boot mode.
3. Chromebook to "Bookwormbook"
I use the Debian 12 aka "Bookworm" network installer to create a minimal, console-only base configuration that can be customized with any services desired for a home server. Read more
4. Home Server
Once Debian is up-and-running, continue with some server-specific configuration and add services. Read more
» Next: Roll your own Linux Desktop Using Openbox
« Previous: A Backup You Don't Have to Think About is a Backup that Gets Done