Install Linux Mint Debian Edition (LMDE 7) in Expert Mode
I like to create encrypted storage space to hold the contents of my home directory that is separate from the space that contains the root filesystem. This makes it easier if I decide to re-install Linux on the target system while preserving user data.
During an install of LMDE 7 aka "Gigi" - if you select the option to automatically erase and partition the disk using LUKS (Linux Unified Key Setup) - the installer creates a single encrypted partition formatted with LVM (Logical Volume Manager) containing two "virtual partitions" (Logical Volumes or LVs): a swap LV, and a root LV that uses all remaining disk storage. There is no option to add a home LV to the automatic schema.
Previously I would resize the root LV to make room for a home LV, but in my daily use I've found LVM to be an extra layer of complexity whose benefits - such as resizing existing LVs and creating new ones - I never end up using. More significantly, LVM makes re-installing the OS while preserving the contents of home more complicated on LMDE (which again is different than how its done on the Ubuntu-based Linux Mint).
My preferred alternative: LMDE offers an expert-mode install option that is considerably more flexible in handling a custom partition layout of disk storage. I use live-installer-expert-mode to create 3 partitions: a small EFI system partition, a root partition, and a LUKS encrypted home partition.
- 1. Start Here
- 2. Live Environment
- 3. Prepare DISK
- 4. Encryption and File Systems
- 5. Install LMDE
- 6. Configuration
- 7. Finish Up
- 8. Resources
1. Start Here
This guide makes a few assumptions:
- Target device is
64-bitarchitecture - System use UEFI to boot with GRUB as bootloader
- LMDE install media prepared on a Linux system
- LMDE is the sole OS on a single disk (example: sda)
- Network access during install uses a (LMDE supported) wired interface
- GPT partition table with 3 partitions:
| Partition | Size | Format | Use as |
|---|---|---|---|
| sda1 | 256MB | vfat | EFI system partition |
| sda2 | 64GB | ext4 | root partition |
| sda3 | ->END | luks | encrypted partition (home device) |
- In lieu of creating a separate
swappartition, after the install I configure zram swap
1.1 Download install image
The latest live ISO install images are available here: Torrents and download mirrors
Download lmde-7-cinnamon-64bit.iso and sha256sum.txt.
Verify the image by running:
sha256sum -c --ignore-missing sha256sum.txt1.2 Prepare USB install media
Prepare a USB storage drive as an installer using one of these two methods:
Method 1: dd
Write the installer to an unmounted USB storage device using the dd command as root.
WARNING
Be very careful to note the proper device. All contents on the device will be lost!
Example: On a Linux system, if a USB stick appears as sdx1, then write the installer to sdx (no partition number):
sudo dd if=/path/to/lmde-7-cinnamon-64bit.iso of=/dev/sdx bs=4M conv=fsync oflag=direct status=progress
sync
Method 2: Ventoy
Use Ventoy to setup a USB device to be a multiboot installer. Simply copy an iso to the device, reboot, and the auto-generated menu lists all the disk images available to boot. Read more
2. Live Environment
Insert the USB install stick into the target device and boot to desktop.
2.1 Switch to root
Open a terminal and switch to a root shell:
sudo -i2.2 Confirm EFI support
cat /sys/firmware/efi/fw_platform_sizeIf the command returns 64, then system is booted in 64-bit x64 UEFI and we are good to go.
If the file does not exist, the device is not using UEFI. Stop here and search online for instructions on how to install LMDE in BIOS boot mode. The partition layout detailed below assumes UEFI boot and will need to be modified accordingly if this is not so.
2.3 Define DISK variables
Identify the disk where LMDE will be installed by listing block devices:
lsblk -fSet DISK variables for either a SATA or NVMe device:
SATA (example: sda)
DISK=/dev/sda
EFI_PART=1
ROOT_PART=2
HOME_PART=3
EFI_DISK=${DISK}${EFI_PART}
ROOT_DISK=${DISK}${ROOT_PART}
HOME_DISK=${DISK}${HOME_PART}
NVMe (example: nvme0n1)
DISK=/dev/nvme0n1
EFI_PART=1
ROOT_PART=2
HOME_PART=3
EFI_DISK=${DISK}p${EFI_PART}
ROOT_DISK=${DISK}p${ROOT_PART}
HOME_DISK=${DISK}p${HOME_PART}
3. Prepare DISK
3.1 Wipe DISK
Before creating the new partition layout, wipe the DISK:
wipefs -af $DISK
sgdisk --zap-all --clear $DISK
partprobe $DISK && sgdisk -p $DISK
NOTE
If LVM was previously used on the drive, this might fail with an error such as Device or resource busy. This is because the volume group might have gotten set up on boot. In such cases, bring it down with:
vgchange -anAfter that, wipefs -af should work.
3.2 Partition DISK
List partition type codes:
sgdisk --list-typesCreate EFI system partition:
sgdisk -n "${EFI_PART}:1m:+256m" -t "${EFI_PART}:ef00" -c 0:esp $DISKCreate root partition:
sgdisk -n "${ROOT_PART}:0:+64g" -t "${ROOT_PART}:8300" -c 0:root $DISKCreate home partition:
sgdisk -n "${HOME_PART}:0:0" -t "${HOME_PART}:8309" -c 0:home $DISKDisplay layout:
partprobe $DISK && sgdisk -p $DISK4. Encryption and File Systems
4.1 Encrypt home partition
cryptsetup luksFormat --type luks2 -y $HOME_DISKUnlock the newly-created home device:
cryptsetup open $HOME_DISK homeSet variable for home device:
HOME_DEV=/dev/mapper/home4.2 Create file systems
Labels are optional, but helpful. They allow for easy mounting without a UUID:
mkfs.vfat -n ESP $EFI_DISK
mkfs.ext4 -L rootfs $ROOT_DISK
mkfs.ext4 -L homefs $HOME_DEV
5. Install LMDE
5.1 Expert Mode
Open a new tab in the terminal.
Launch the LMDE installer in expert-mode:
sudo live-installer-expert-modeProceed as normal up to Installation Type. Select Manual Partitioning.
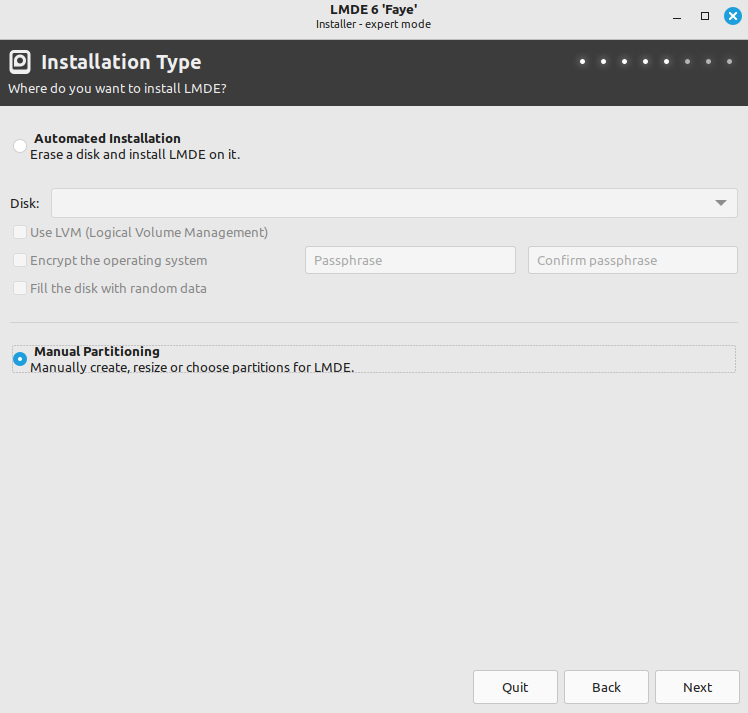
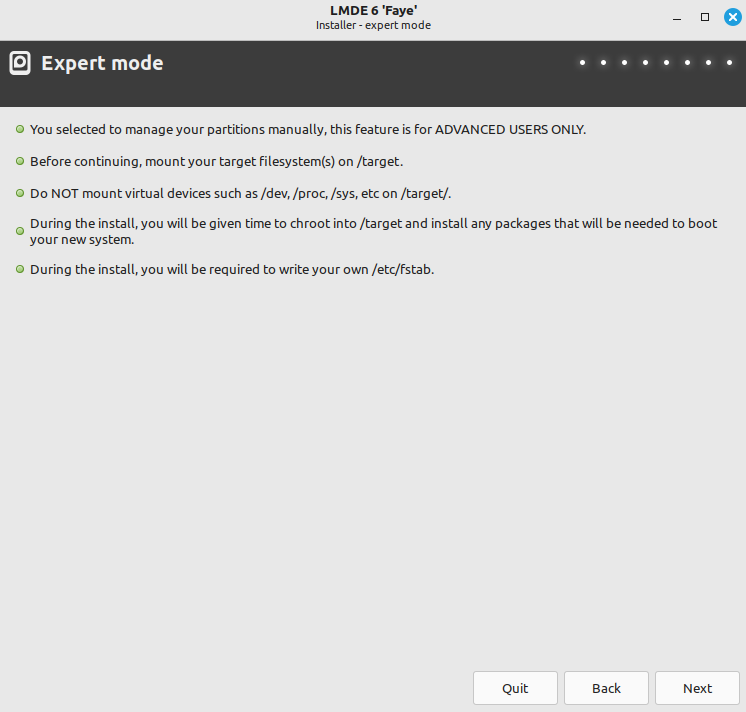
In the Partitioning window, click Expert mode.
Before continuing, we mount our target filesystems on /target.
5.2 Mount file systems
Switch back to the root terminal.
Mount the previously created filesystems:
mount --mkdir LABEL=rootfs /target
mount --mkdir LABEL=homefs /target/home
mount --mkdir LABEL=ESP /target/boot/efi
5.3 Install
Switch back to the installer window and click Next.
Proceed to Summary and confirm:
Home encryption: disabled(entire partition is LUKS-encrypted)Install bootloader on /dev/<storage_device>(example:/dev/sdawith no partition number)Use already mounted /target
When satisfied, click Install.
LMDE install proceeds as per usual up to Installation paused.
Do the following before continuing the install:
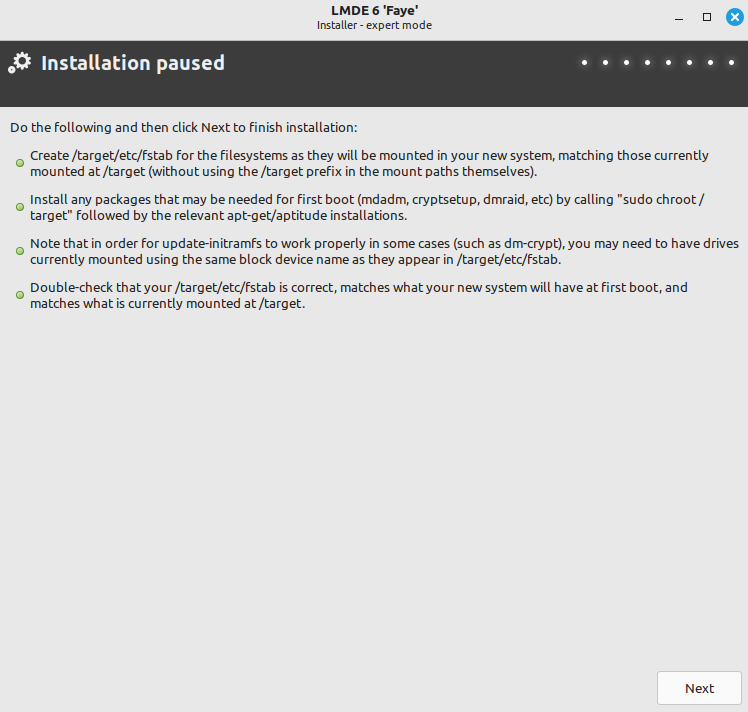
5.4 Fstab
Set filesystems that will be mounted at boot:
echo "LABEL=ESP     /boot/efi   vfat  defaults  0 1" >> /target/etc/fstab
echo "LABEL=rootfs  /           ext4  defaults  0 1" >> /target/etc/fstab
echo "LABEL=homefs  /home       ext4  defaults  0 2" >> /target/etc/fstab
5.5 Crypttab
Set home to be opened at boot:
echo "home PARTLABEL=home none luks,discard" >> /target/etc/crypttab5.6 Complete installation
Switch back to installer window and click Next to complete installation.
When prompted Do you want to restart your computer to use the new system? choose No.

6. Configuration
6.1 Mount virtual file systems
Mount virtual file systems for the new install environment:
mount --bind /dev /target/dev
mount --bind /dev/pts /target/dev/pts
mount -t proc /proc /target/proc
mount -t sysfs /sys /target/sys
6.2 Chroot
Copy resolv.conf to enable network access inside chroot environment:
cp /etc/resolv.conf /target/etc/resolv.confMake changes inside the local installed system by accessing it from the LMDE live installer:
chroot /target/ /bin/bashChange the prompt to highlight actions inside chroot:
export PS1="(chroot) $PS1"6.3 Add packages
Update the package repository contents and install extra packages:
apt update && apt install systemd-cryptsetup zram-tools6.4 Zram swap
Settings are modified in /etc/default/zramswap.
Uncomment PERCENT and set amount of RAM used by zram as a percentage of total memory available:
PERCENT=25Uncomment PRIORITY and set the priority of the swap device:
PRIORITY=1007. Finish Up
Exit the chroot environment:
exit7.1 Unmount virtual file systems and partitions
NOTE
Partition /target/boot/efi is auto-unmounted by the installer.
umount /target/dev/pts
umount /target/dev
umount /target/proc
umount /target/sys
umount /target/home
umount -l -n -R /target
7.2 Remove encrypted home mapping
cryptsetup close homeReboot system.
7.3 First boot
User is prompted for the passphrase to unlock the encrypted home partition. Upon success, boot resumes...
Welcome to LMDE!
NOTE
The default plymouth (boot) theme mint-logo fails to display properly rendered text for the password prompt on the splash screen to unlock home partition (except for this detail it otherwise works correctly). After a successful first boot, possible workarounds are to switch to another built-in plymouth theme or (my choice) disable plymouth and use a text-based password prompt. To do so, edit /etc/default/grub.d/50_lmde.cfg and remove splash from GRUB_CMDLINE_LINUX_DEFAULT. Save changes and run update-grub.
8. Resources
- Release notes for LMDE 7 and upstream Debian 13 "Trixie". Pay particular attention to 5. Issues to be aware of for trixie.
- I created a shell script that automates the above work in preparing the target device for the install: lmde-expert-mode-assist
You can like, share, or comment on this post on Mastodon 💬
» Next: Real-time File Synchronization Across Devices Using Syncthing
« Previous: Install NetBSD (Short and Sweet Version)