Minimal Debian Bookworm
Debian 12 is the latest stable release of the popular Linux operating system, created by volunteers of one of the largest and longest-running free software projects in the world. There are three release branches: stable (code-named Bookworm), testing (Trixie), and unstable (Sid).
I use the Debian network install image to create an encrypted, console-only base configuration that can be customized further for various tasks.
This is how I do it...
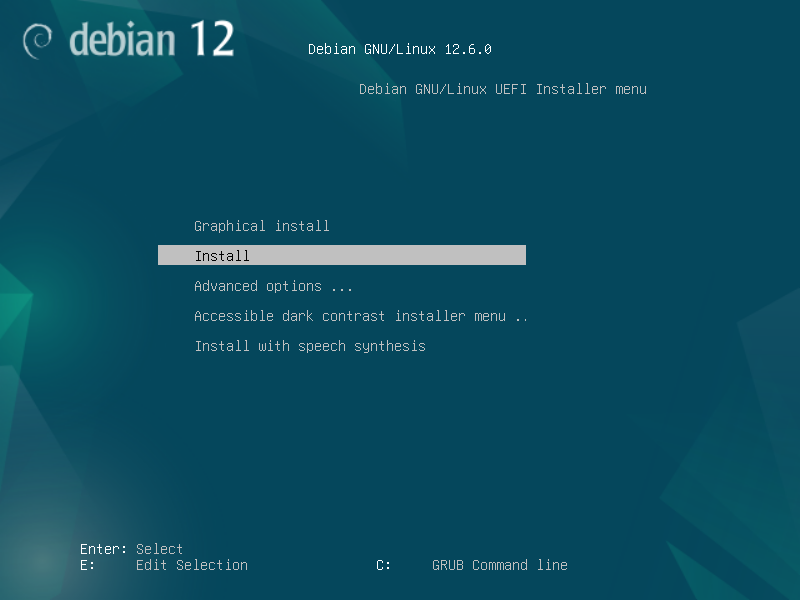
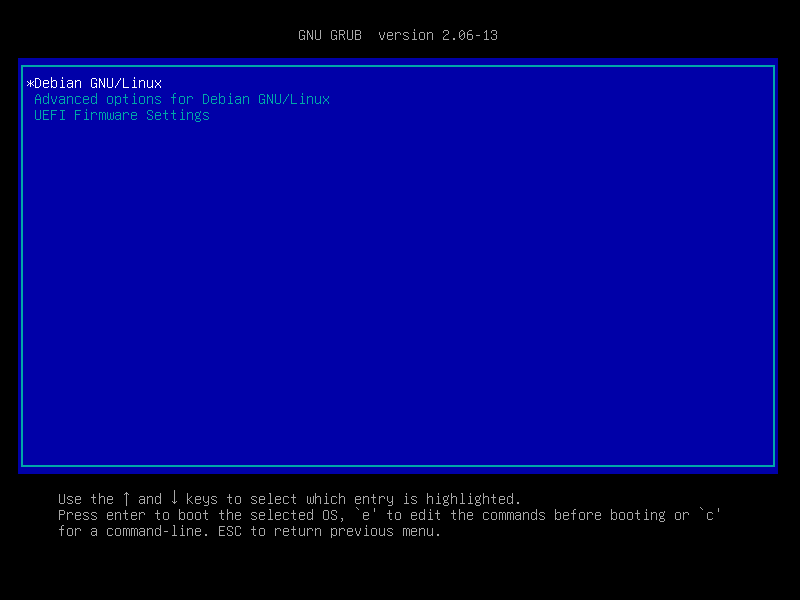
1. Let's go!
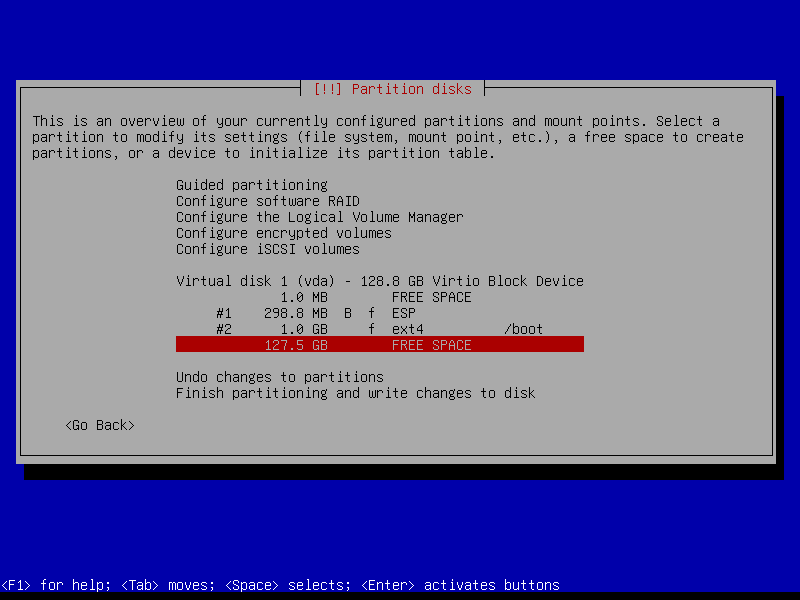
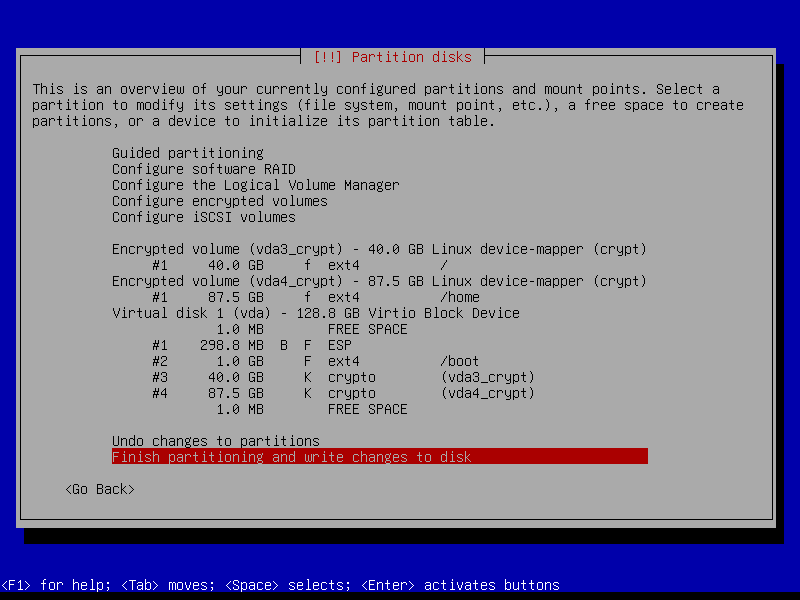
Below is a visual walk-through of an installation that makes use of the entire disk divided into four partitions: an ESP partition (UEFI systems), a boot partition, an encrypted root partition, and an encrypted home partition.
I like to create encrypted storage space to hold the contents of my home directory that is separate from the encrypted space that contains the root filesystem. This makes it easier if I decide to re-install Linux on the target system while preserving user data.
1.1 Setup
- Target device is
x86_64architecture - UEFI boot with GRUB as bootloader
- Debian is the sole OS on a single disk (example: vda)
- In lieu of creating a separate
swappartition, after the install I setup zram swap - GPT partition table with 4 partitions:
- vda1 = Size:
300MB; Format:vfat; Use as:EFI system partition - vda2 = Size:
1GB; Format:ext4; Use as:bootloader partition - vda3 = Size:
40GB; Format:luks; Use as:encrypted partition- Device:
/dev/mapper/root; Format:ext4; Use as:root device
- Device:
- vda4 = Size:
->END; Format:luks; Use as:encrypted partition- Device:
/dev/mapper/home; Format:ext4; Use as:home device
- Device:
- vda1 = Size:
1.2 Download
The latest network ISO amd64 install images are available here: cdimage.debian.org
Download debian-<version>-amd64-netinst.iso and SHA256SUMS.
On a Linux-based system, verify the image:
$ sha256sum -c --ignore-missing SHA256SUMSFor other architectures supported by Debian, see install images for the current release.
1.3 Prepare install media
Prepare a USB storage device as an installer using one of these two methods:
Method 1: Ventoy
I now use Ventoy to setup a USB device to be a multiboot installer. Simply copy an iso to the device, reboot, and the auto-generated menu lists all the disk images available to boot. Read more
Method 2: dd
Write the installer to an unmounted USB storage device using the dd command as root.
BE VERY CAREFUL TO NOTE THE PROPER DEVICE. ALL DATA ON THE DEVICE WILL BE OVERWRITTEN.
Example: On a Linux system, if a USB stick appears as sdx1, then write the installer to sdx (no partition number):
# dd if=/path/to/debian-<version>-amd64-netinst.iso of=/dev/sdx bs=1M status=progress
$ sync
2. Install
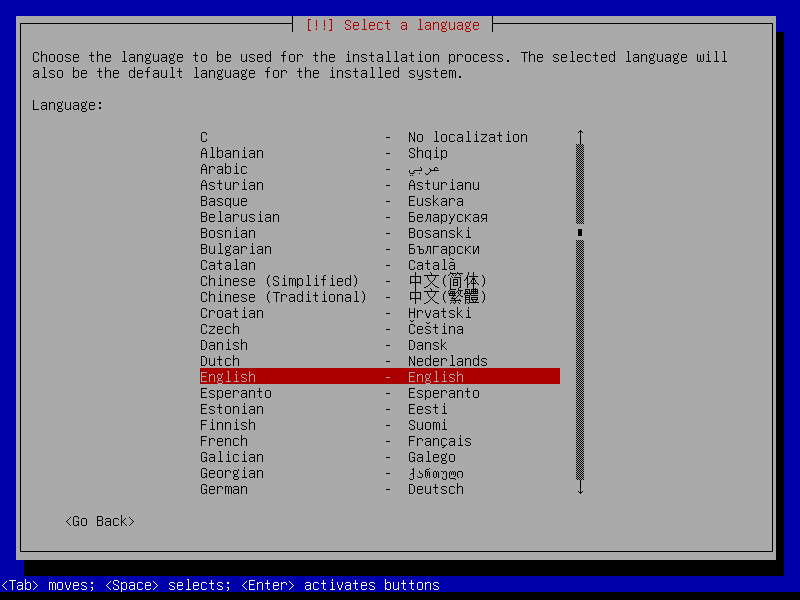
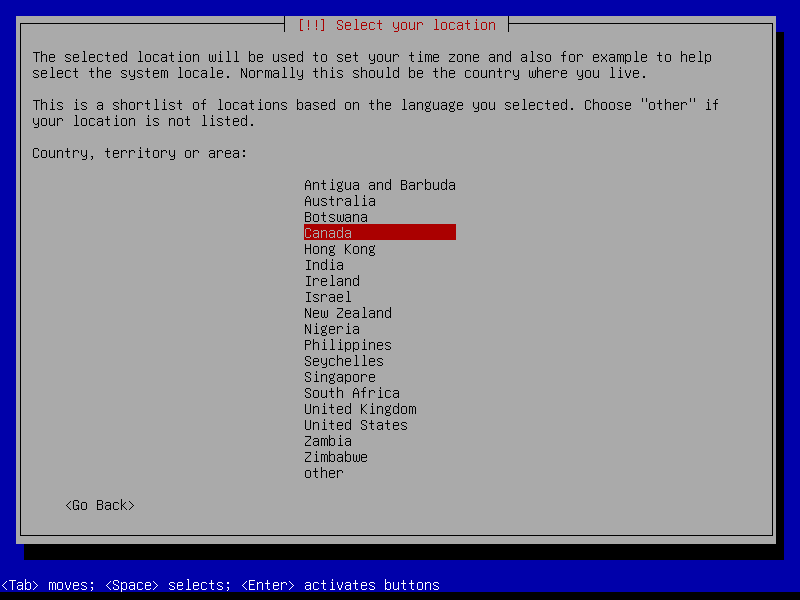
2.1 Boot and initial configuration
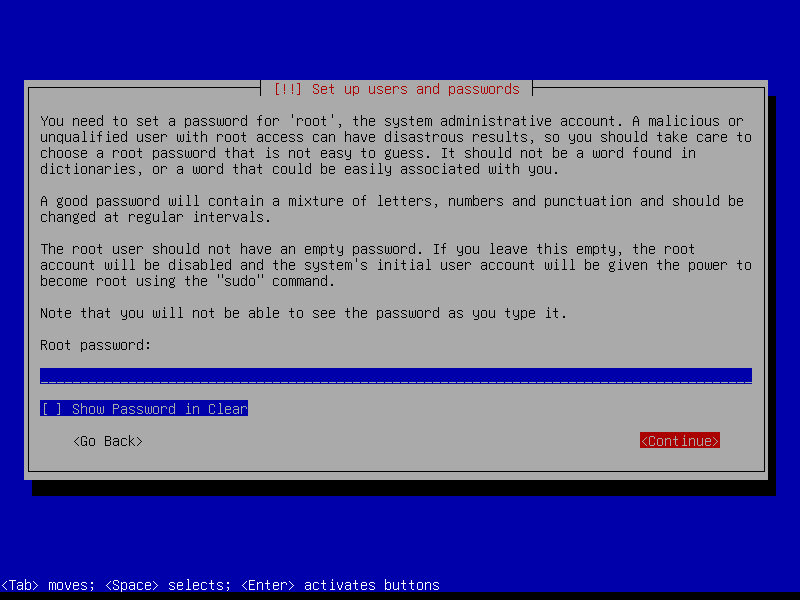
2.2 Root and user
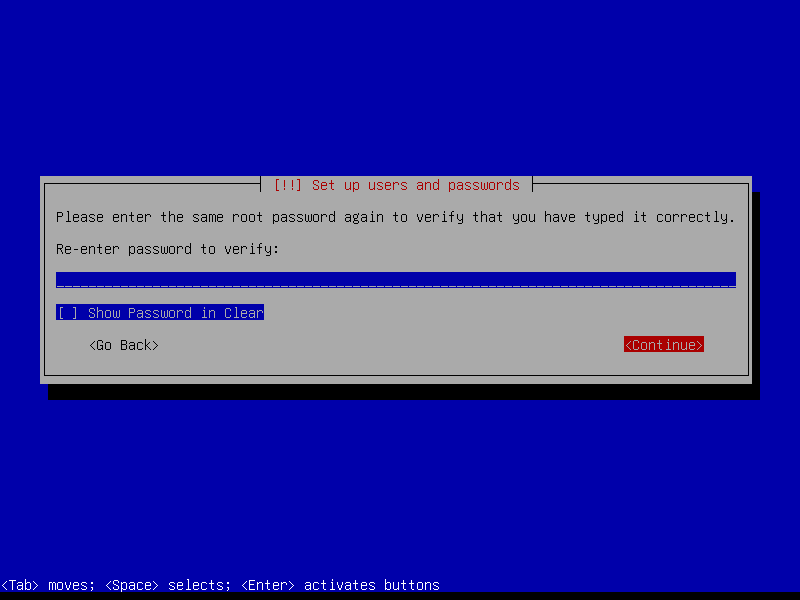
Leave the root password empty to automatically assign the user account created during install to the sudo group (root can be activated post-install if desired by running the command sudo passwd root):
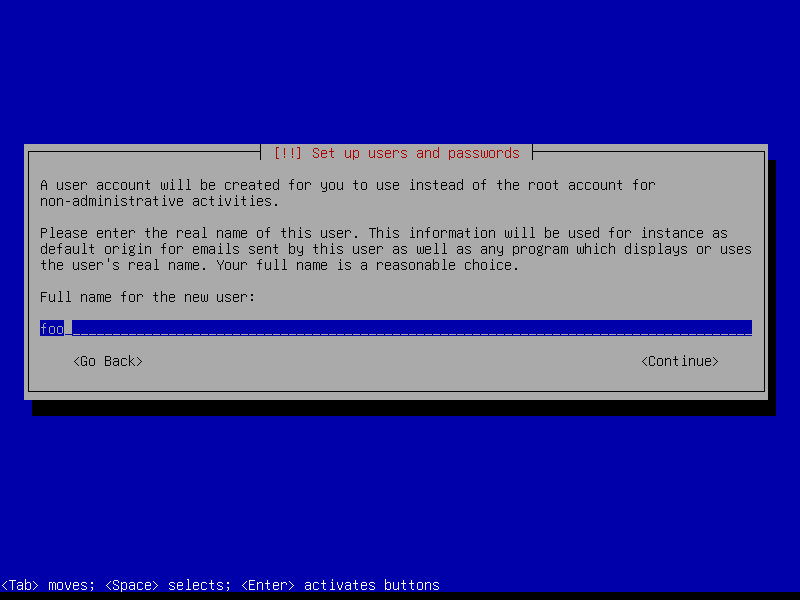
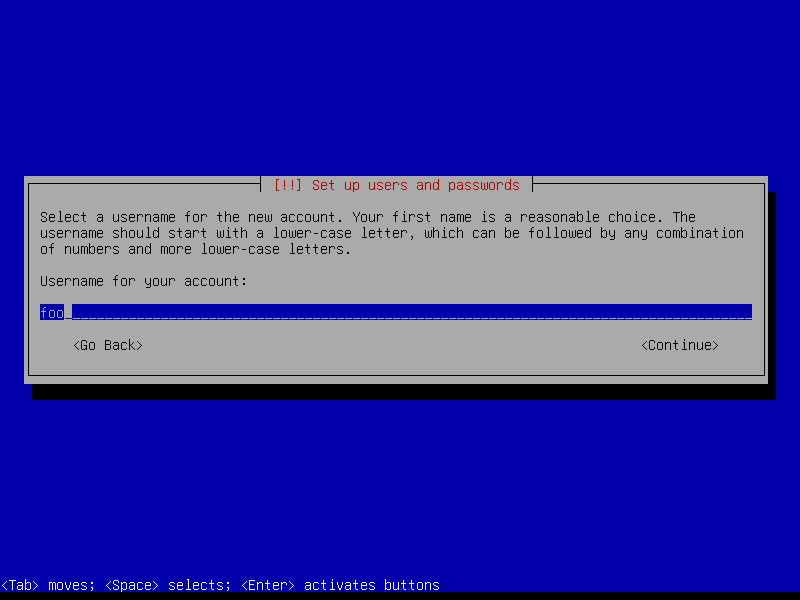
Create a user account (example: username foo):
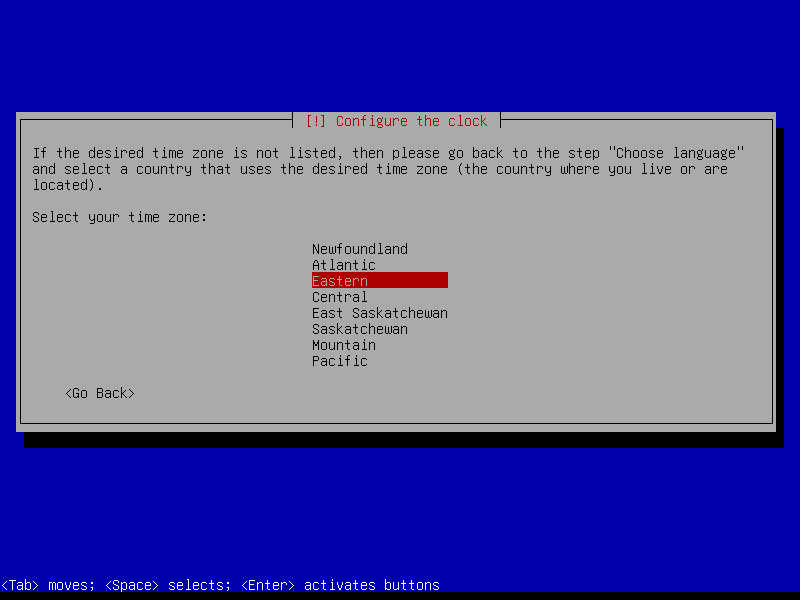
2.3 Timezone
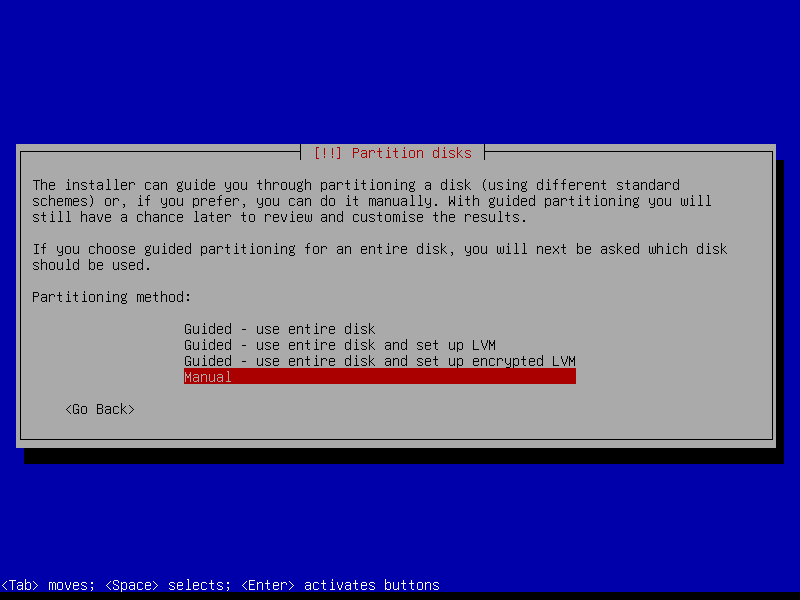
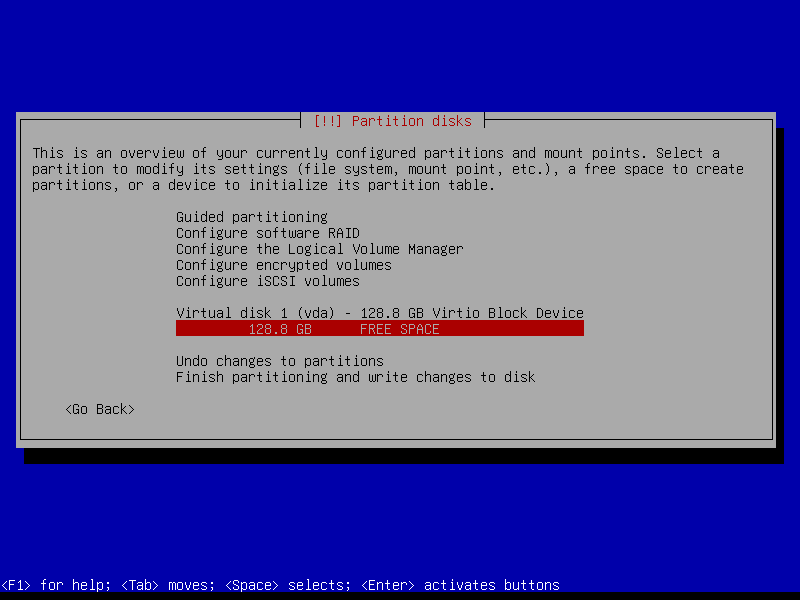
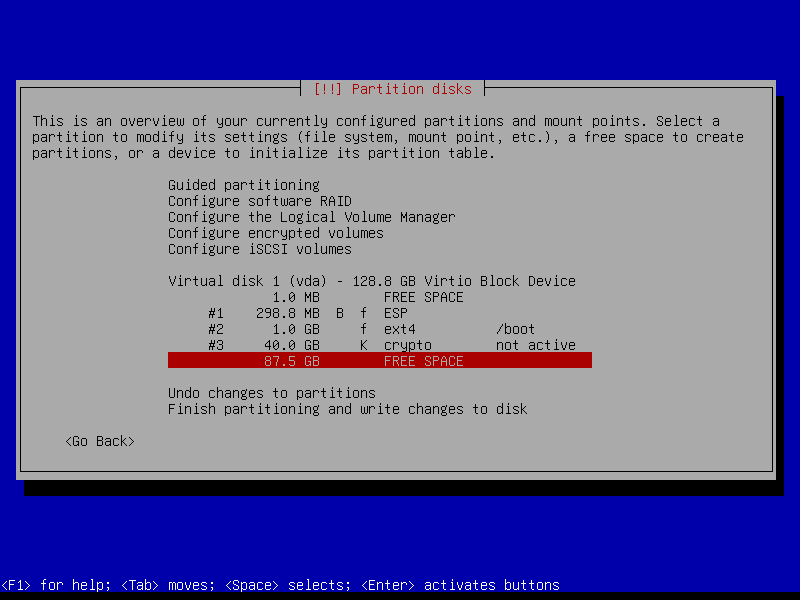
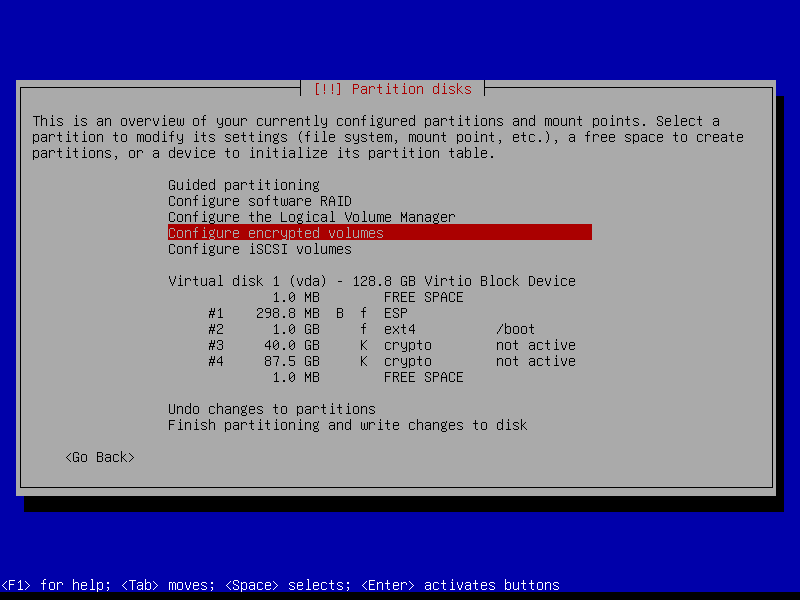
2.4 Partitions
Select Manual option for more fine-grained control:
2.4.1 Select device and create partition table
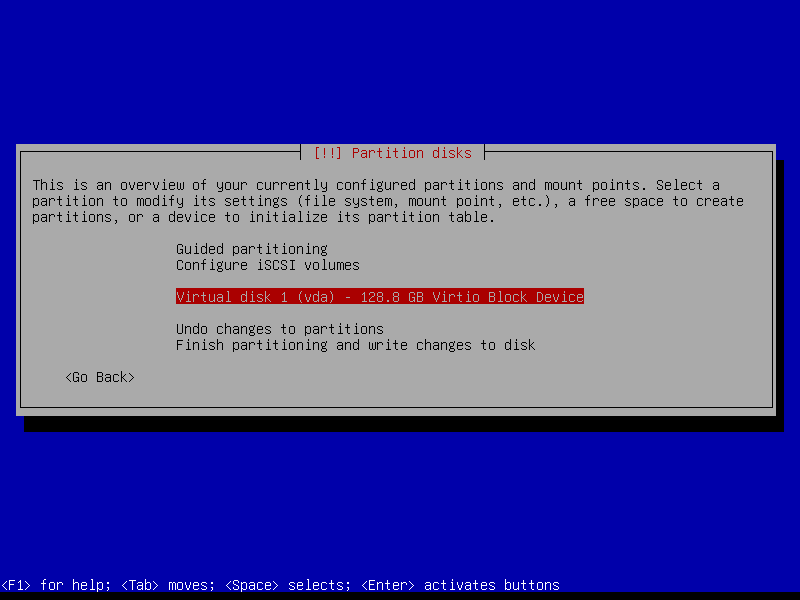
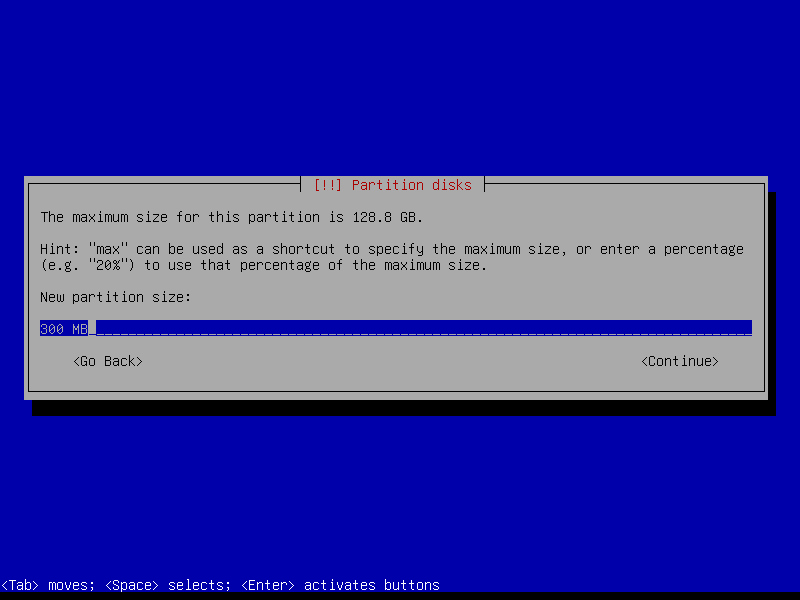
2.4.2 Create EFI partition (Size: 300 MB)


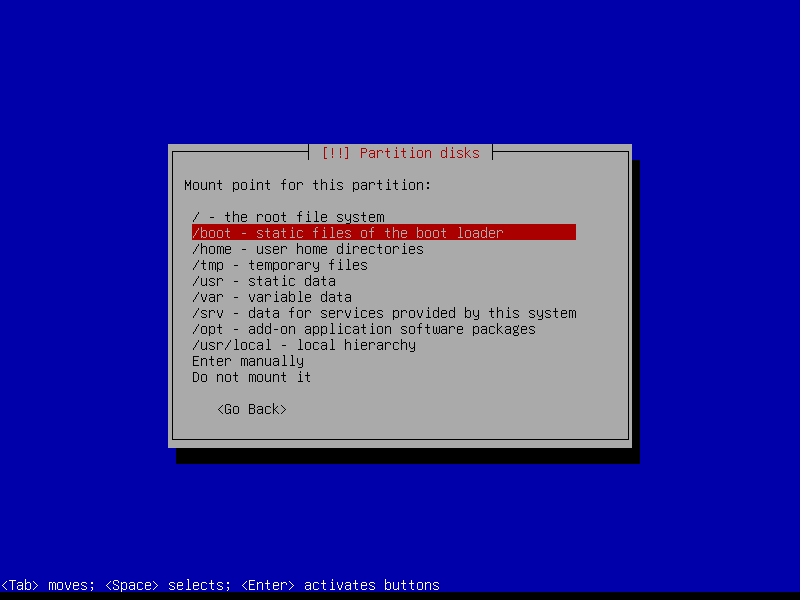
2.4.3 Create boot partition (Size: 1 GB)


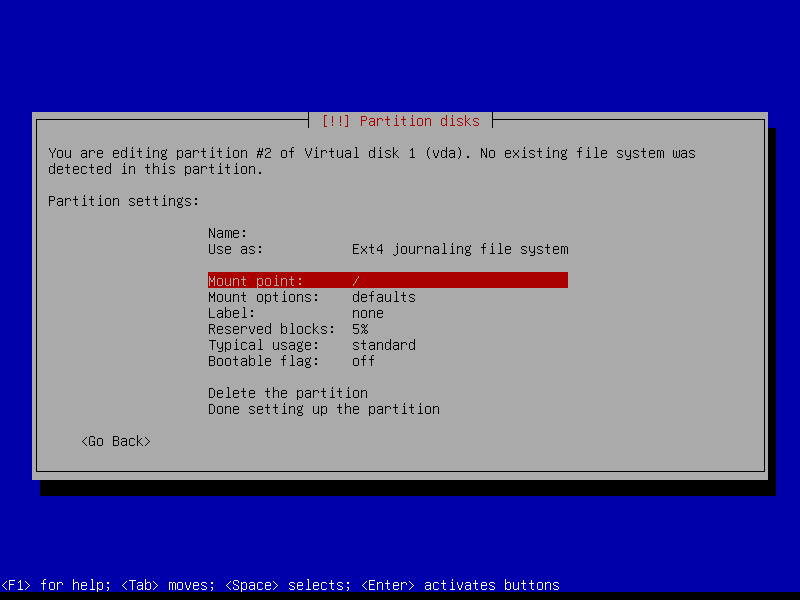

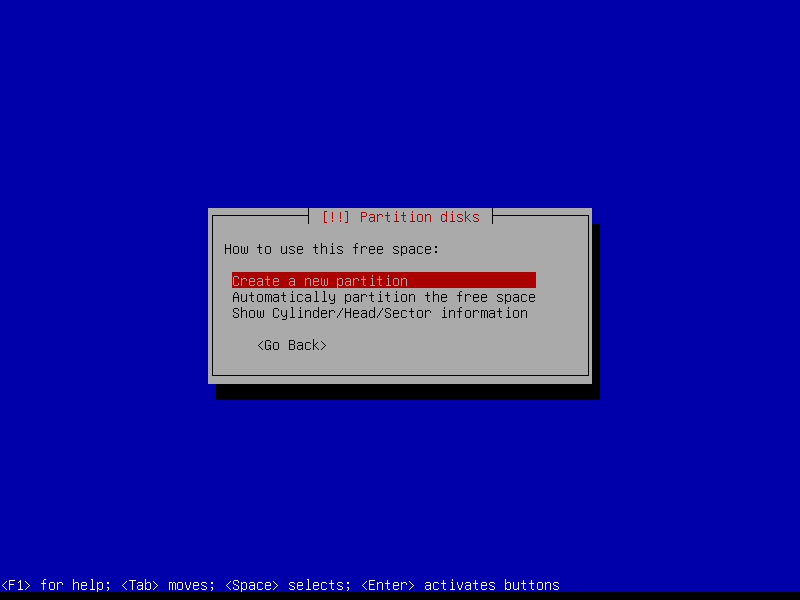
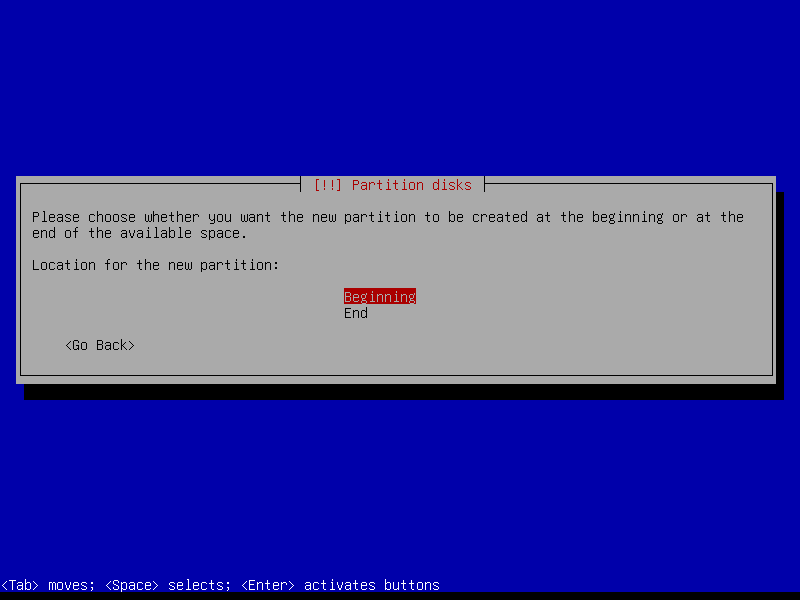
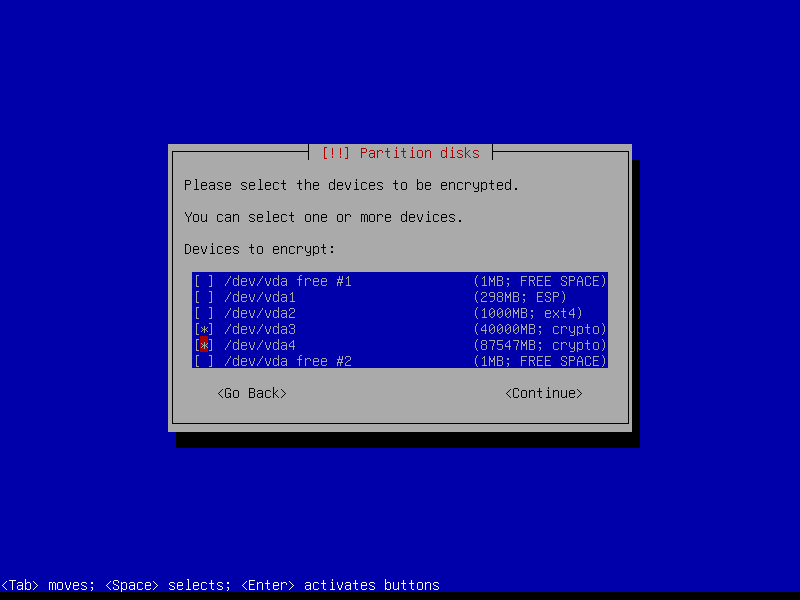
2.4.4 Create encrypted root partition (Size: 40 GB)


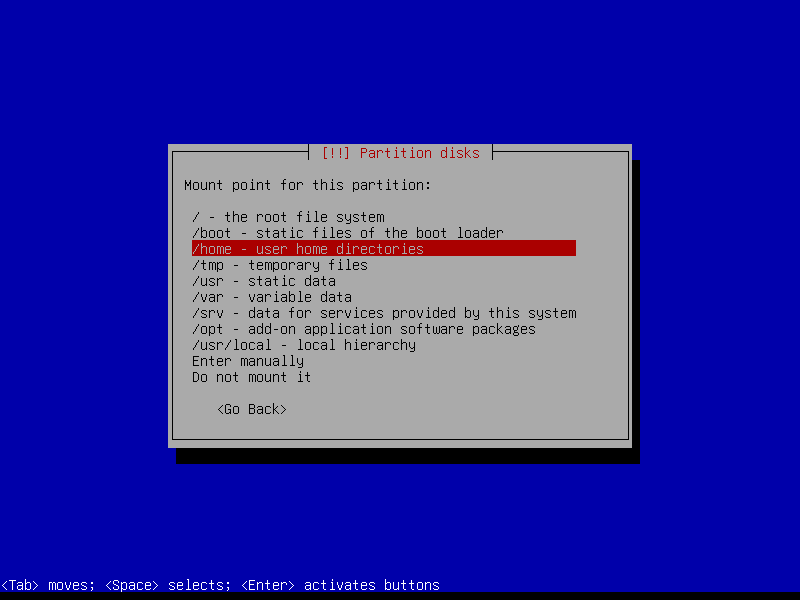
2.4.5 Create encrypted home partition (Size: remaining storage)


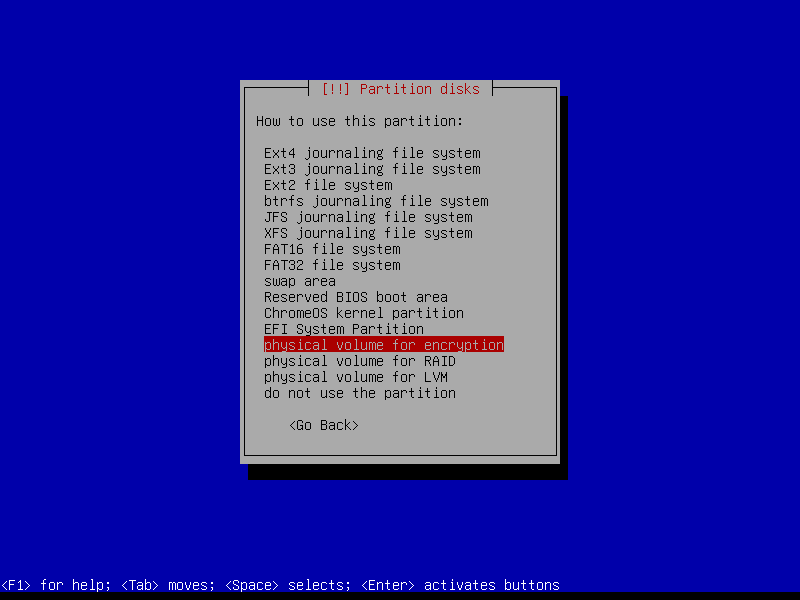

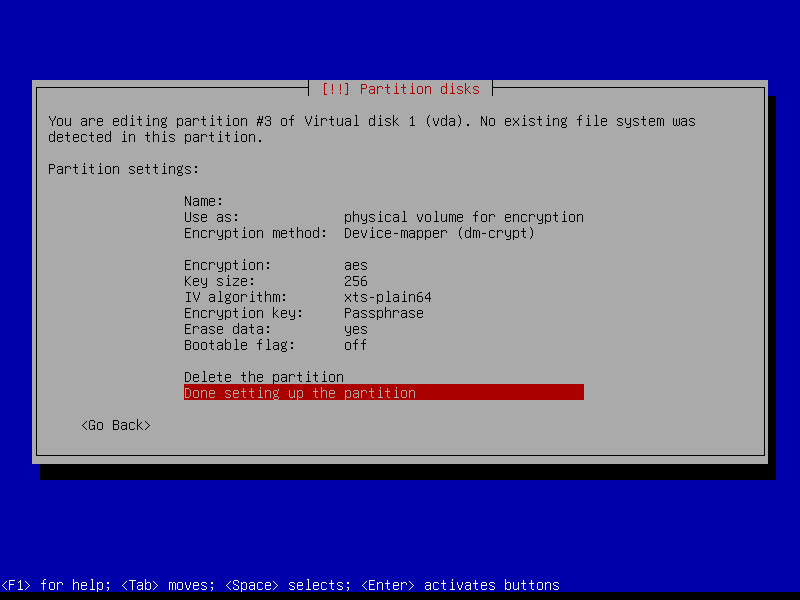
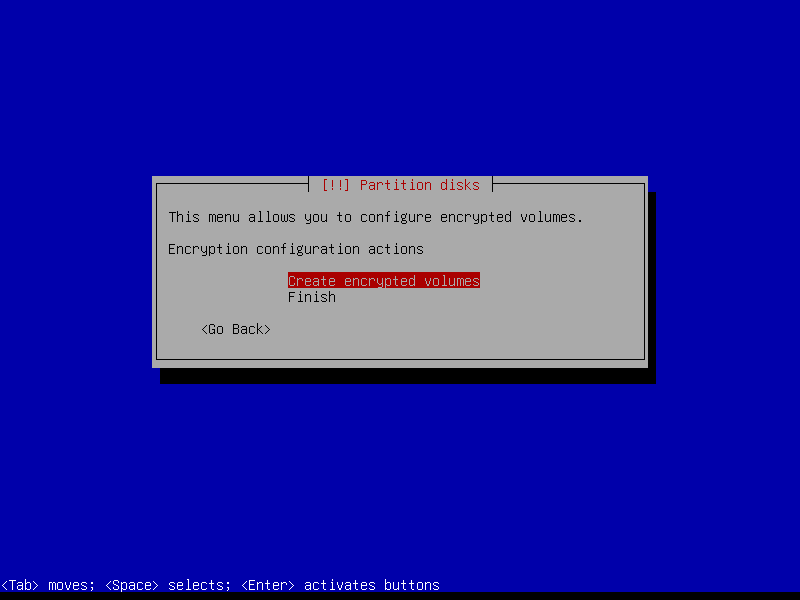
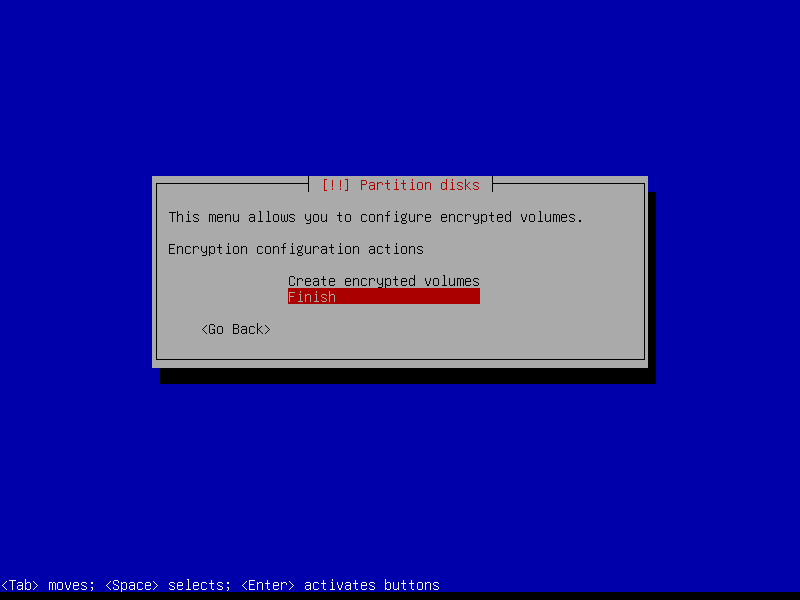
2.4.6 Configure encrypted partitions
Erase data on the root partition:
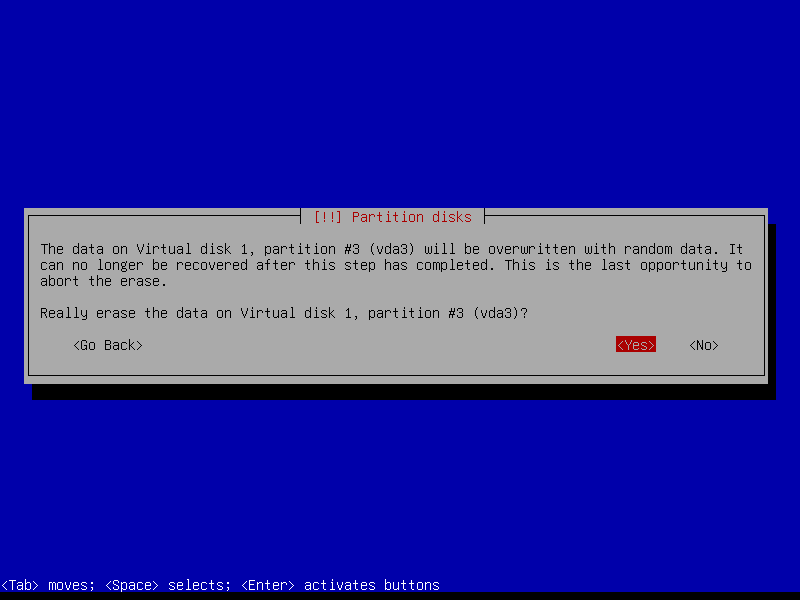
Repeat on the home partition:

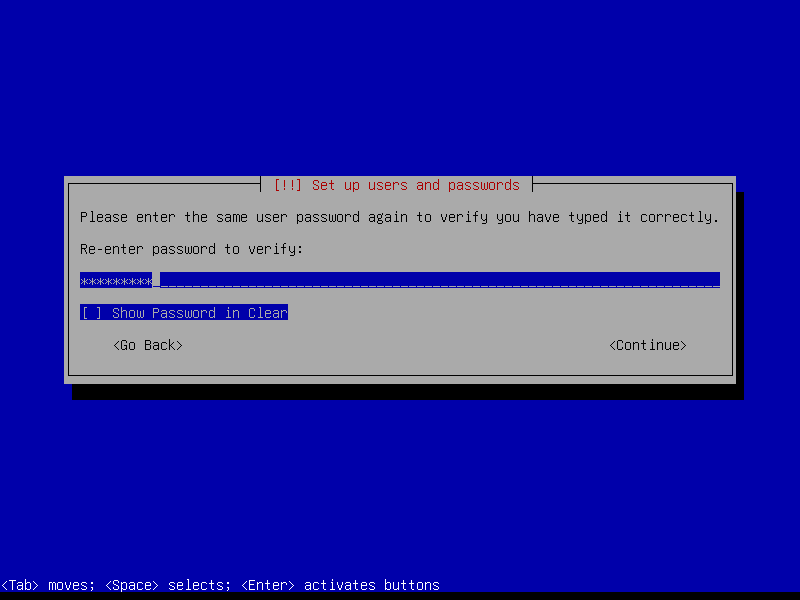
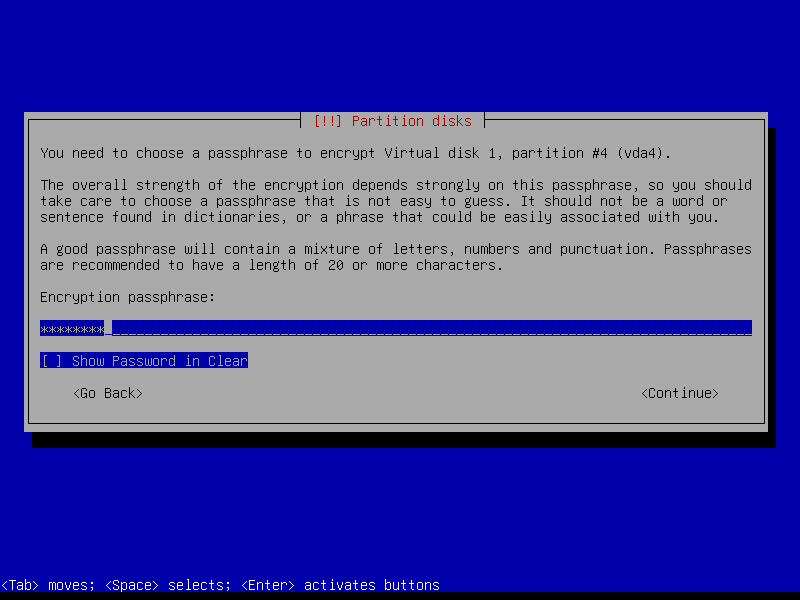
Create a strong encryption passphrase for root partition:

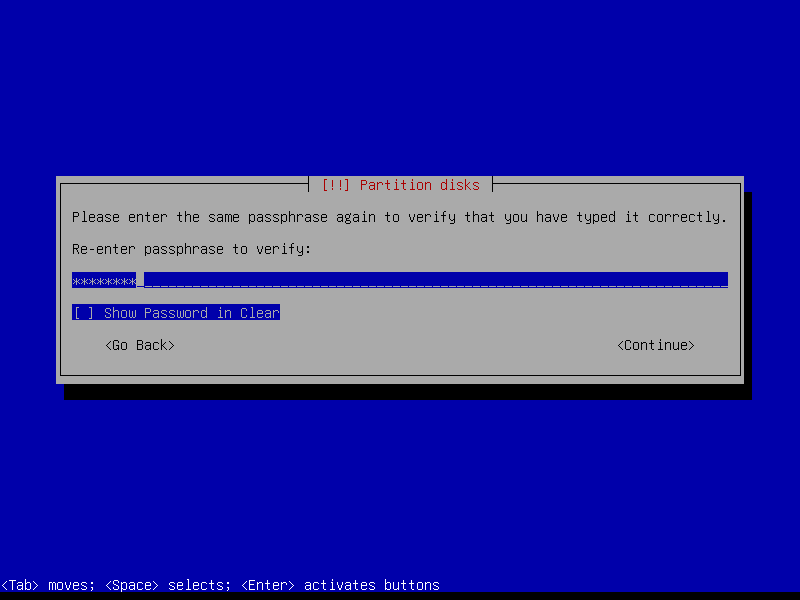
Repeat for home partition:

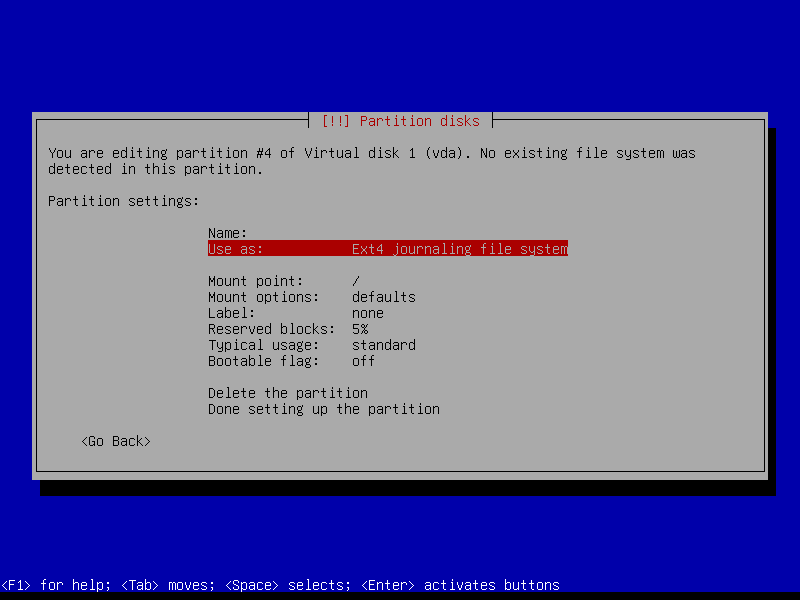
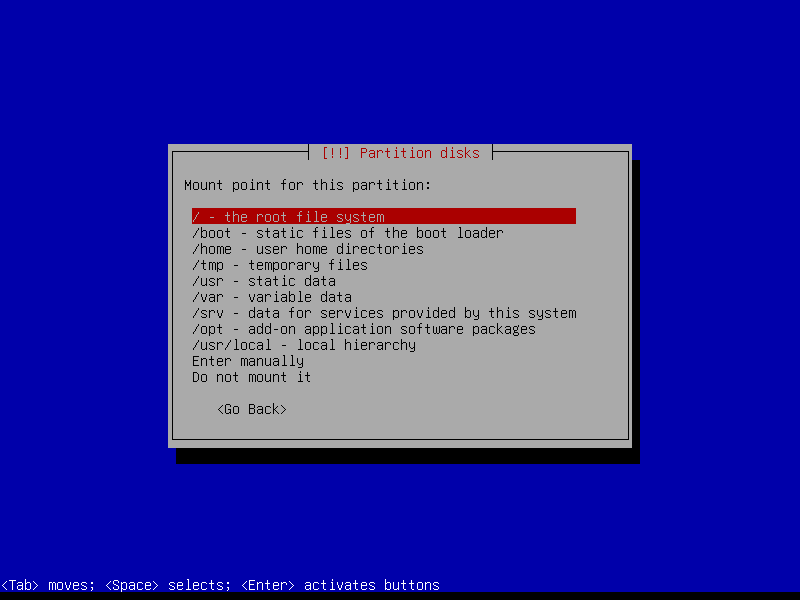
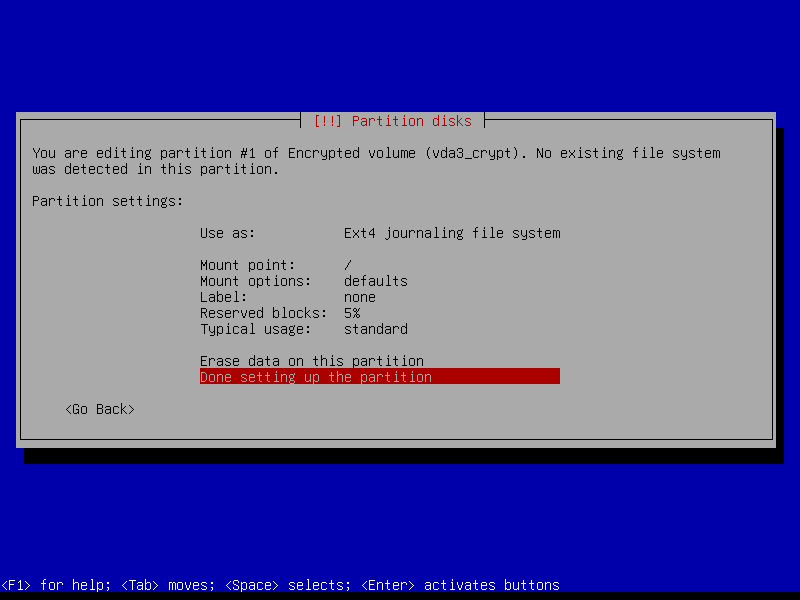
2.4.7 Configure root volume
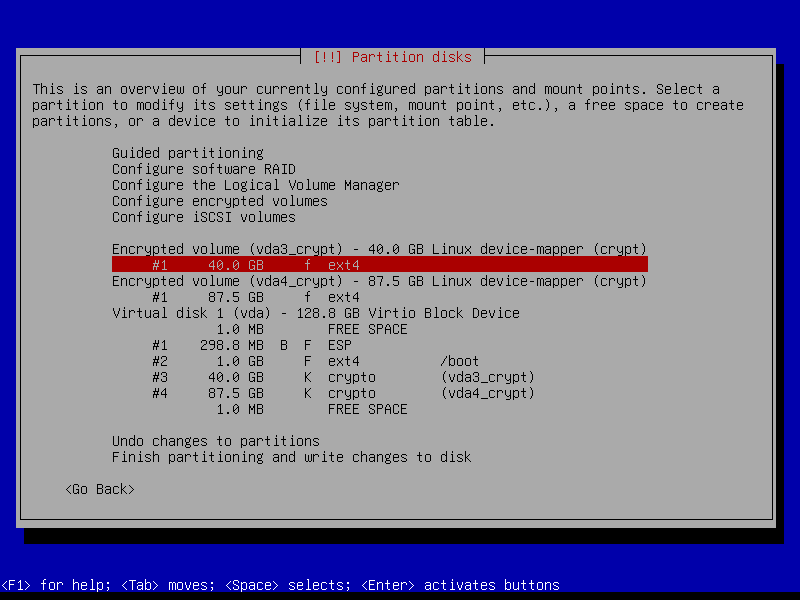

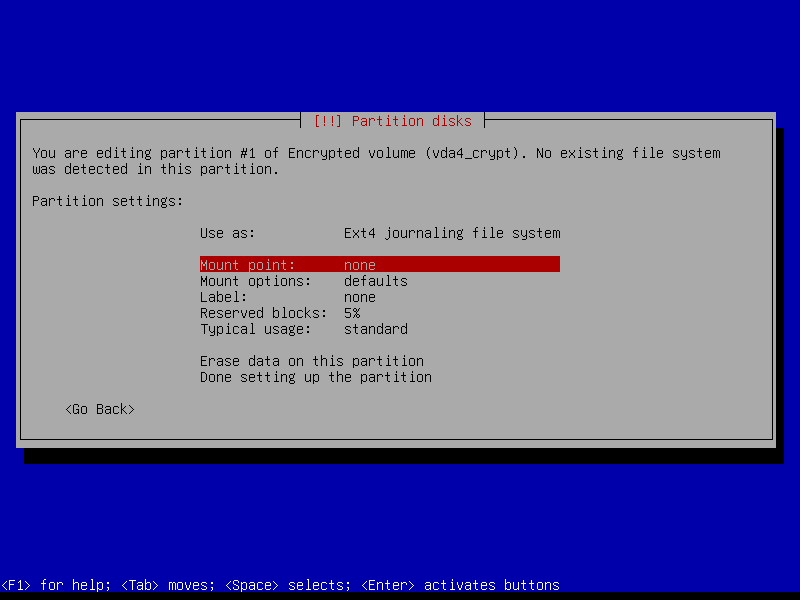
2.4.8 Configure home volume
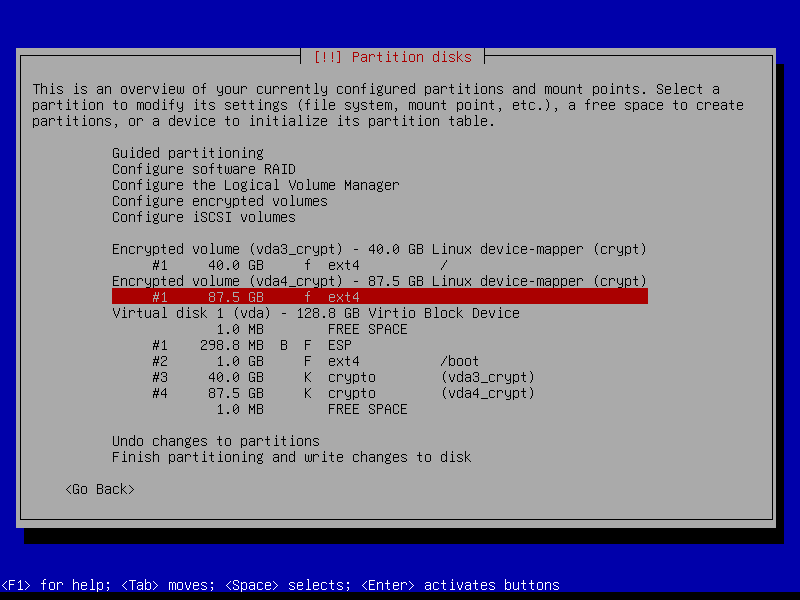

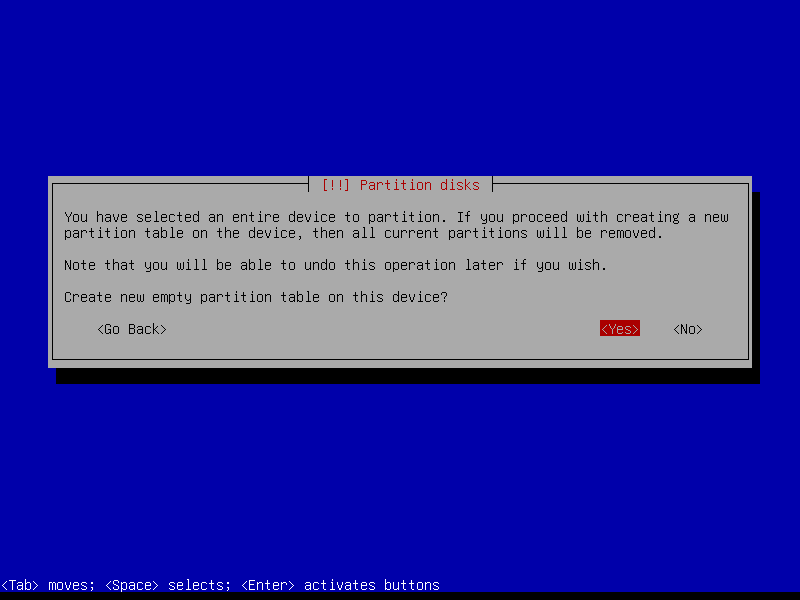
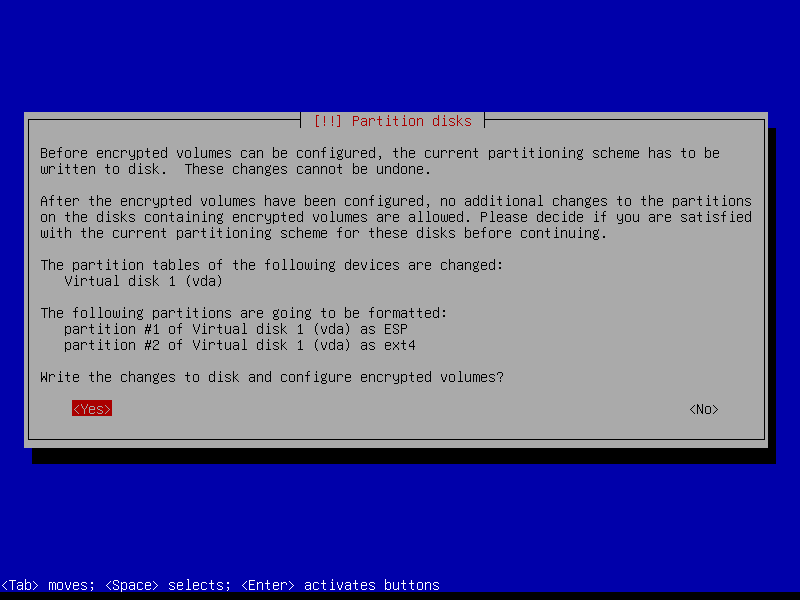
2.4.8 Write changes to disk
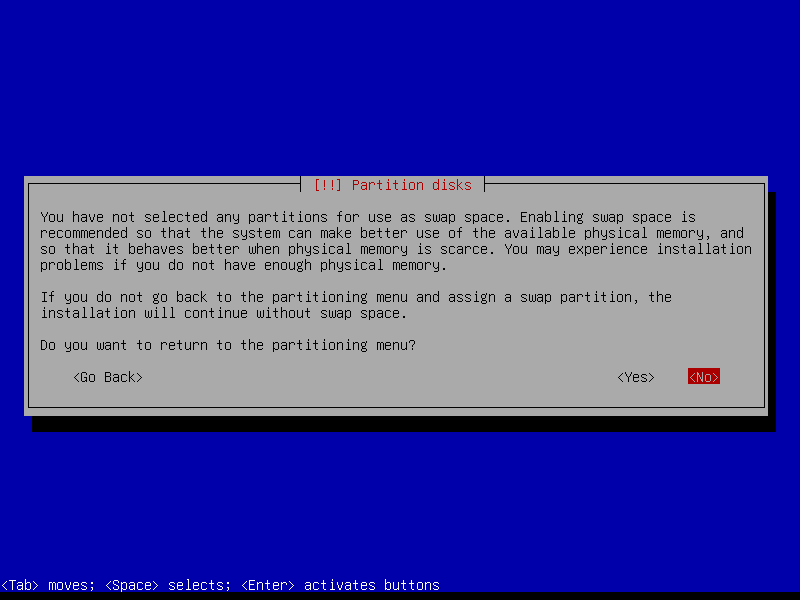
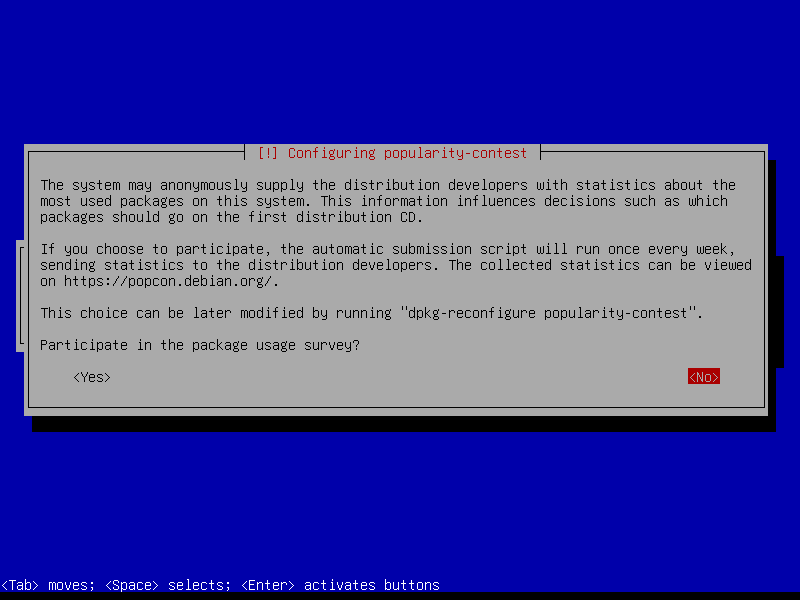
We create a zram swap device post-install, so answer No here:

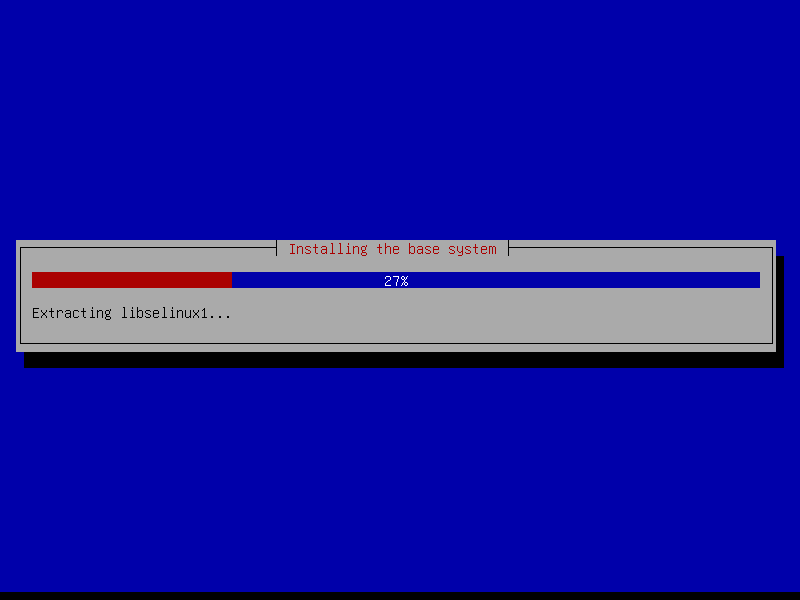
2.5 Install base system
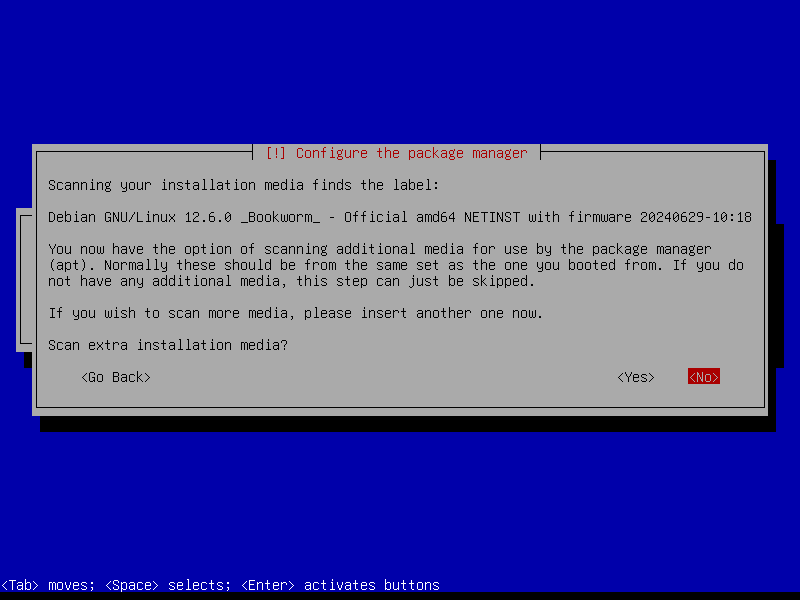
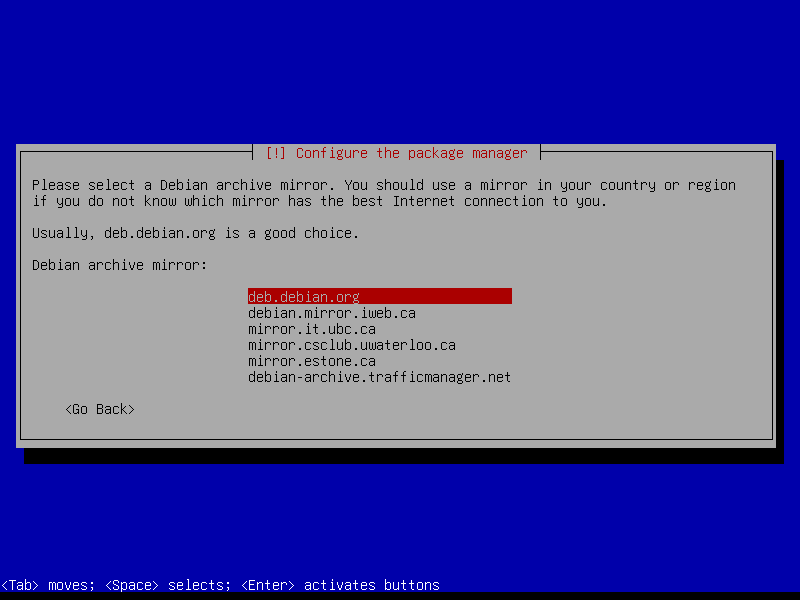
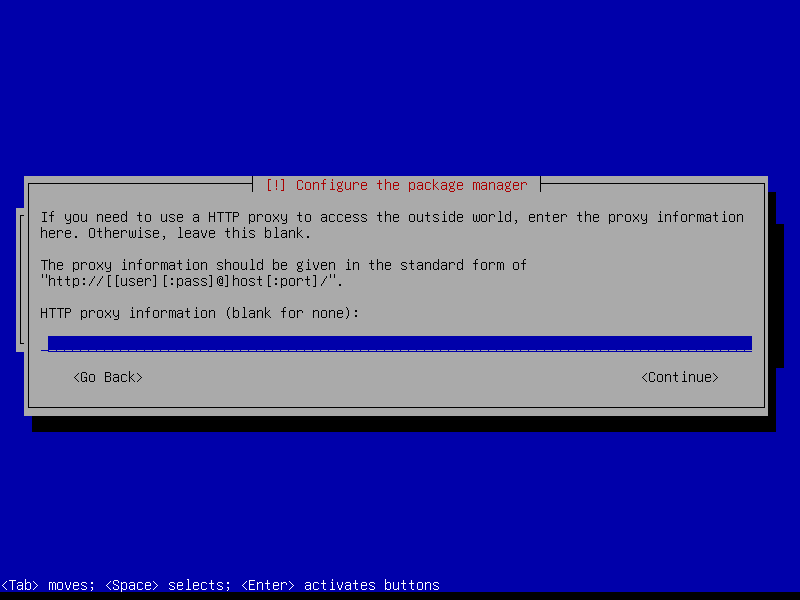
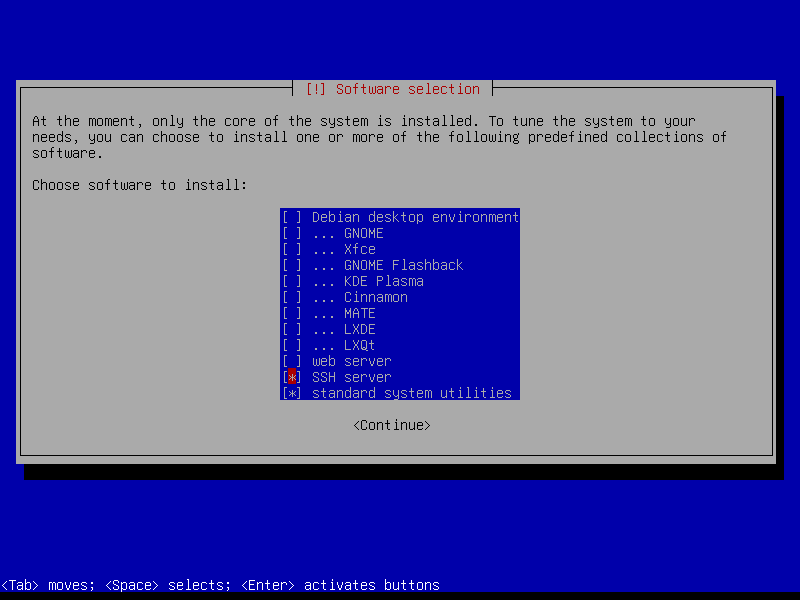
2.6 Additional packages

Use the Debian global mirrors service deb.debian.org:
Select only [*] SSH server and [*] standard system utilities and leave the other tasks unmarked:
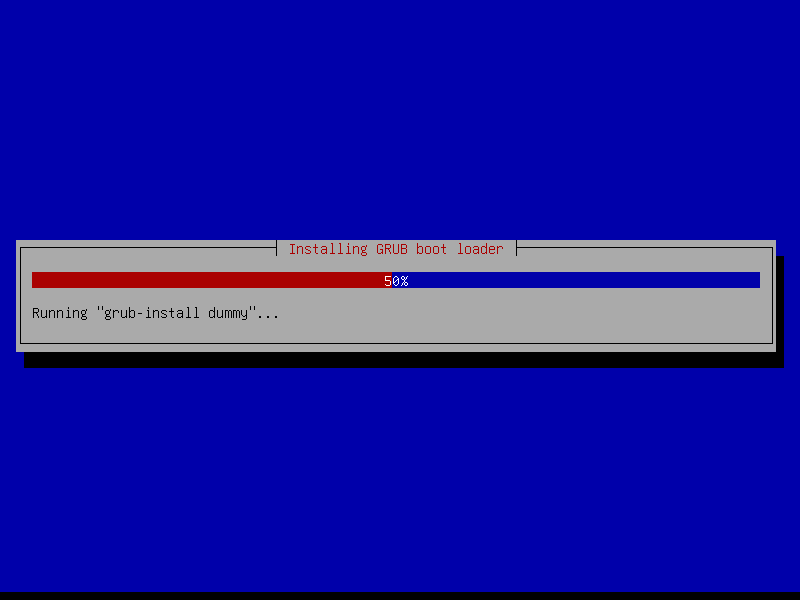
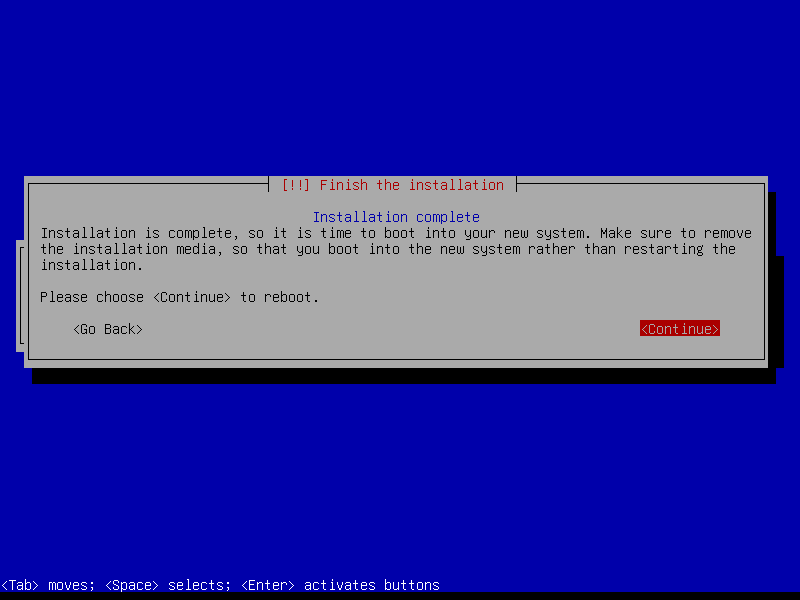
2.7 Finish
Packages are downloaded and the installer makes its finishing touches:
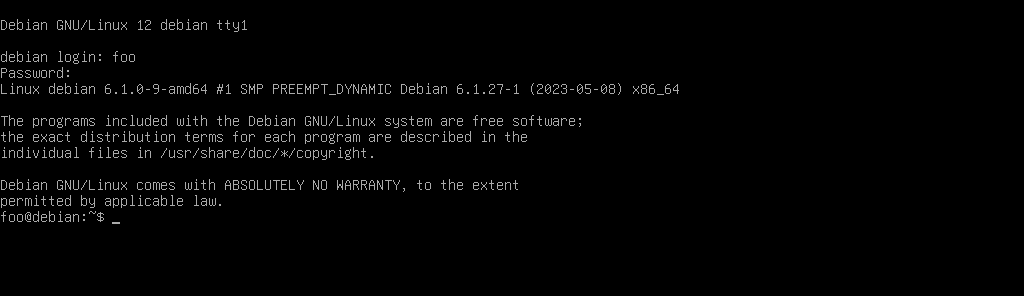
3. First boot
User is prompted for the passphrase to unlock the encrypted root partition:

A second prompt to unlock the encrypted home partition (later we create a keyfile to forego entering two passphrases):

Welcome to Debian!
4. Configure Debian
4.1 Check for errors
Failed systemd services:
$ sudo systemctl --failedHigh priority errors in the systemd journal:
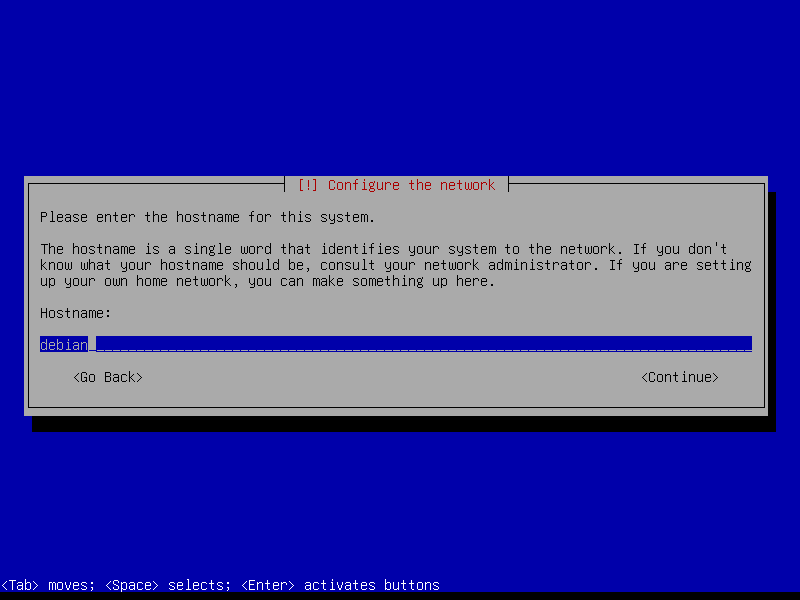
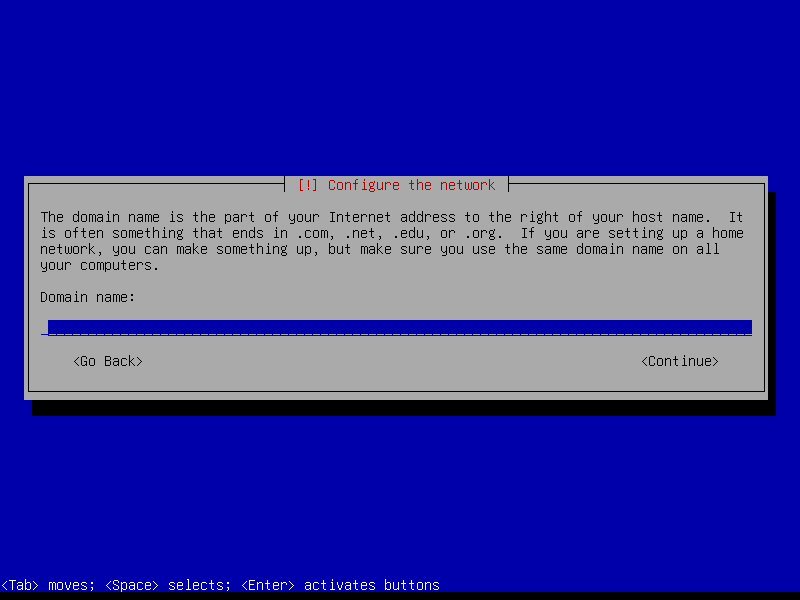
$ sudo journalctl -p 3 -xb4.2 Network
By default, wired (ethernet) interfaces are configured for auto-detection and to use DHCP.
Display all detected network interfaces along with their IP and MAC addresses:
ip addrDebian's network interfaces are configured in /etc/network/interfaces and controlled by the ifup and ifdown commands.
Example entry for wired interface using DHCP:
allow-hotplug enp0s31f6
iface enp0s31f6 inet dhcp
For wireless:
allow-hotplug wlp61s0
iface wlp61s0 inet dhcp
  wpa-ssid <wifi_access_point_name>
  wpa-psk  <wifi_passphrase>
4.3 Package repositories
Debian uses separate archives to distinguish between software packages based on their licenses:
- Main is enabled by default and includes everything that satisfies the conditions of the Debian Free Software Guidelines.
- Contrib packages are open-source themselves but rely on software in non-free to work.
- Non-free contains packages that do not meet all the conditions of the DFSG but can be freely distributed.
- Non-free-firmware (introduced in Debian 12) contains non-free firmware binaries packaged for devices that would be completely non-functional without them (example: many wireless cards).
- Backports contains packages drawn from the testing (and sometimes unstable) archive and modified to work in the current stable release.
All backports are disabled by default (to prevent unintended system upgrades) and are installed on a per PACKAGE basis by running:
$ sudo apt -t bookworm-backports install PACKAGEModify /etc/apt/sources.list to add contrib, non-free, non-free-firmware, and backports:
# cat <<EOF > /etc/apt/sources.list
> deb http://deb.debian.org/debian/ bookworm main contrib non-free non-free-firmware
> deb-src http://deb.debian.org/debian/ bookworm main contrib non-free non-free-firmware
>
> deb http://security.debian.org/debian-security bookworm-security main contrib non-free non-free-firmware
> deb-src http://security.debian.org/debian-security bookworm-security main contrib non-free non-free-firmware
>
> deb http://deb.debian.org/debian/ bookworm-updates main contrib non-free non-free-firmware
> deb-src http://deb.debian.org/debian/ bookworm-updates main contrib non-free non-free-firmware
>
> deb http://deb.debian.org/debian/ bookworm-backports main contrib non-free non-free-firmware
> deb-src http://deb.debian.org/debian/ bookworm-backports main contrib non-free non-free-firmware
> EOF
Any time sources.list is modified its necessary to update the package database:
$ sudo apt update4.4 Upgrade
$ sudo apt full-upgrade4.5 (Optional) Network manager
Install a network manager utility. Packages network-manager and network-manager-gnome provide the console nmcli and graphical nm-applet clients respectively . Comment out (deactivate) any entries in interfaces that will be managed by network-manager.
4.6 Sudo without password
Allow user foo to execute superuser commands without being prompted for a password.
Create /etc/sudoers.d/sudoer_foo:
$ echo 'foo ALL=(ALL) NOPASSWD: ALL' | sudo tee /etc/sudoers.d/sudoer_foo4.7 Console font
Discover available fonts in /usr/share/consolefonts.
Default font might prove too small on high resolution displays. Set and display a font (example: Lat15-TerminusBold22x11) for the current session:
$ sudo setfont Lat15-TerminusBold22x11To make the selection persistent:
$ sudo dpkg-reconfigure console-setup
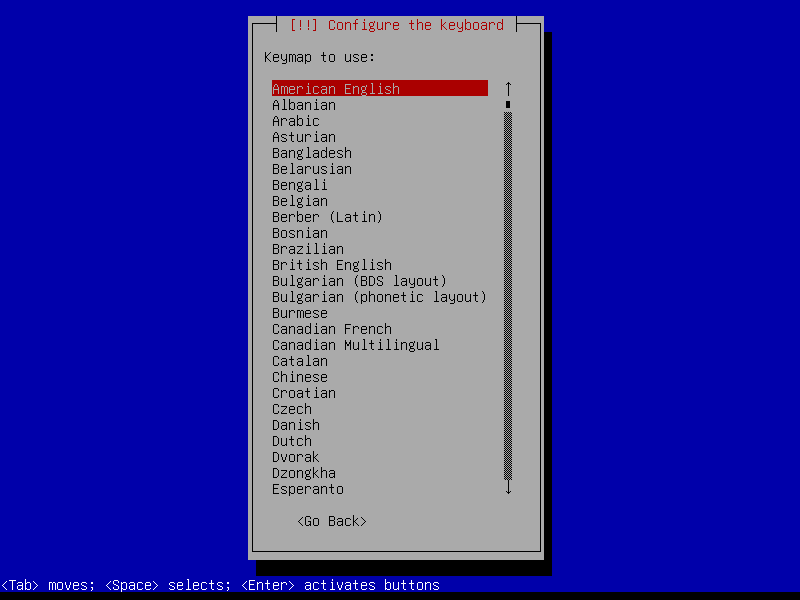
$ sudo setupcon4.8 Keyboard
Default console keymap is US QWERTY.
For a different keymap, install:
$ sudo apt install -y console-dataAvailable keymaps are listed in /usr/share/keymaps/.
Select a different keymap by running:
$ dpkg-reconfigure keyboard-configuration
$ setupcon
Enable use of desired keymap when entering LUKS passphrase in GRUB by rebuilding initramfs:
$ sudo update-initramfs -u -k all4.9 Sysctl
If a non-root user runs dmesg to read the contents of the kernel message buffer they will see:
dmesg: read kernel buffer failed: Operation not permittedTo allow users to read the kernel log, modify /etc/sysctl.conf by adding:
kernel.dmesg_restrict = 0Reload the configuration:
$ sudo sysctl -p4.10 Command not found
Automatically search repositories when entering an unrecognized command, courtesy of the command-not-found package:
$ sudo apt install command-not-found apt-file
$ sudo apt-file update && sudo update-command-not-found
Re-login to activate.
4.11 Locate
Setup the plocate command and database for finding files:
$ sudo apt install plocate && sudo /etc/cron.daily/plocate4.12 Custom user prompt
Modify ~/.bashrc and create a colourful custom prompt:
# colour codes
GREEN="\\[\\e[1;32m\\]"
YELLOW="\\[\\e[1;33m\\]"
BLUE="\\[\\e[1;34m\\]"
MAGENTA="\\[\\e[1;35m\\]"
WHITE="\\[\\e[1;37m\\]"
RESET="\\[\\e[0m\\]"

# Set a two-line prompt. If accessing via ssh include 'ssh-session' message.
if [[ -n "$SSH_CLIENT" ]]; then
    ssh_message="-ssh_session"
fi
PS1="${MAGENTA}\\u ${WHITE}at ${GREEN}\\h${YELLOW}${ssh_message} ${WHITE}in ${BLUE}\\w \\n$WHITE\$${RESET} "
Add aliases and functions, enable unlimited history, and more.
Source: .bashrc
4.13 Firmware
Intel and AMD processors may periodically need updates to their firmware.
Microcode can be updated (and kept in volatile memory) during boot by installing either intel-microcode or amd64-microcode (AMD):
$ sudo apt install intel-microcodeSee: Microcode
4.14 Use zram for swap
Instead of using a separate swap partition or swapfile, an alternative is to create a swap device in RAM itself with the kernel module zram. Read more
4.15 Secure access using SSH keys
Configure remote access to the target device using crypto keys, and disable password logins. Read more
4.16 Keyfile to unlock home
After entering the passphrase to unlock the encrypted root partition at system boot, a keyfile stored on the now-unlocked partition can be used to auto-unlock encrypted home.
Create crypthome.key and restrict access to root:
$ sudo dd bs=512 count=4 iflag=fullblock if=/dev/random of=/crypthome.key
$ sudo chmod 400 /crypthome.key
Add keyfile to the LUKS key slot of the home partition. In this HOWTO example, that would be /dev/vda4:
$ sudo cryptsetup luksAddKey /dev/vda4 /crypthome.keyVerify:
$ sudo cryptsetup luksDump /dev/vda4
...
Keyslots:
  0: luks2
...
  1: luks2
...
Original passphrase occupies Key Slot 0 and the keyfile has been added to Key Slot 1.
Modify /etc/crypttab and replace none with the key file path and the key-slot it occupies (key-slot=1):
vda4_crypt UUID=<a_long_string_of_characters> /crypthome.key luks,discard,key-slot=1Reboot. Now there is only the single prompt for an encrypted passphrase.
4.17 Where to go next
How about a laptop home server? Or a lightweight desktop using Openbox?
I hope you enjoy Debian!
5. Resources
- Broad overview of system administration for non-developers: Debian Reference
- Searchable interface that packs a lot of information about a given package on a single page: Debian Package Tracker
- In-depth guide to becoming a Debian power-user/sysadmin. Read online or download the ebook: The Debian Administrator's Handbook by Raphaël Hertzog and Roland Mas
- Encrypted root may pass sensitive information to an unencrypted swap partition that survives a system reboot: Encrypt a swap partition
- Except for the mention of a few Ubuntu-specific items, this excellent guide is equally relevant to putting together a Debian server: Mastering Ubuntu Server - Fourth Edition by Jay LaCroix
You can like, share, or comment on this post on Mastodon 💬
» Next: Zram Swap on Debian and LMDE
« Previous: Run BOINC on a Headless Linux Server