Re-install Linux Mint 21.1 to an Existing LVM Logical Volume on LUKS
When installing Linux Mint, I like to create storage space to hold the contents of my home directory that is separate from the space that contains the root filesystem. If for any reason I wish to re-install Mint in the future, this setup will preserve user data when installing a fresh copy of the operating system.
Let's go!
My previous install used a combination of Linux Unified Key Setup (LUKS) and Logical Volume Manager (LVM) to encrypt the storage space and create "virtual partitions" (Logical Volumes or LVs) for separate root and home file systems.
My setup
Current layout for (example) disk vda:
vda1- BIOS GRUB partition (unused)vda2- EFI system partition (unencrypted)vda3- boot partition (unencrypted)vda4- LUKS partition (encrypted) with LVM containing:rootLVhomeLVswapLV
Goal: Re-install Linux Mint to root LV while leaving home LV untouched.
This is how I do it ...
1. Before running the installer: Unlock LUKS
Open the terminal and switch to root with sudo -i.
Identify the encrypted LUKS partition ...
lsblk -f | grep LUKSFor the purposes of this HOWTO, the example used will be the drive vda and LUKS partition vda4.
Unlock the partition ...
cryptsetup open /dev/vda4 vda4_crypt2. Something else
Start the installer.
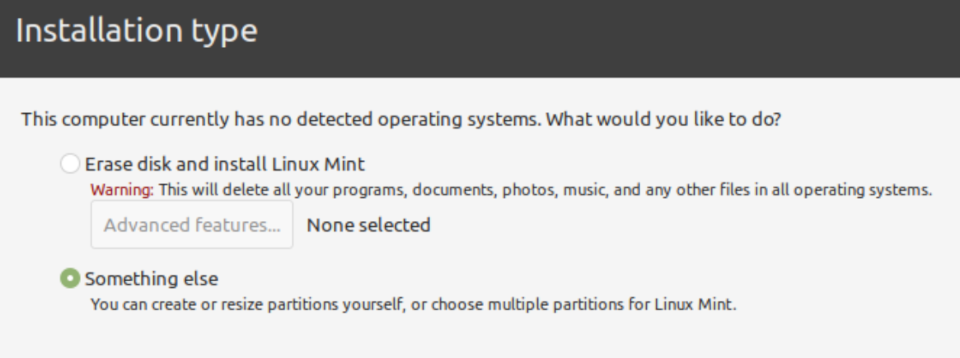
At Installation type choose Something else.
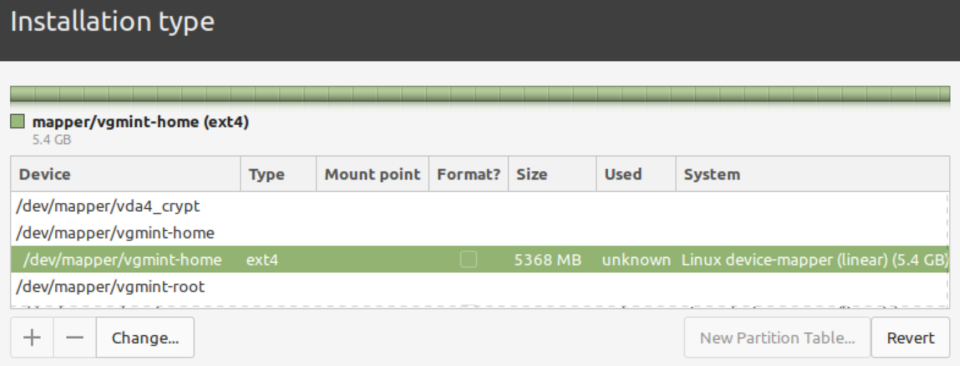
Partitions and the LVM LV's will appear in the installer.
3. Home
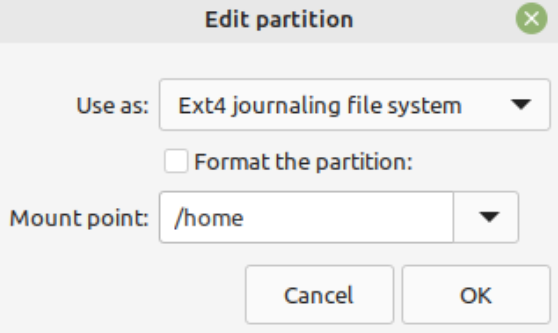
Configure /dev/mapper/vgmint-home and do NOT format (keep our user data intact).
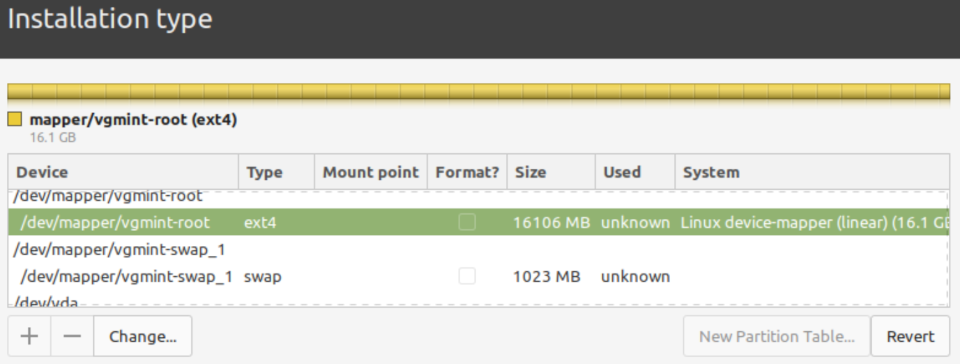
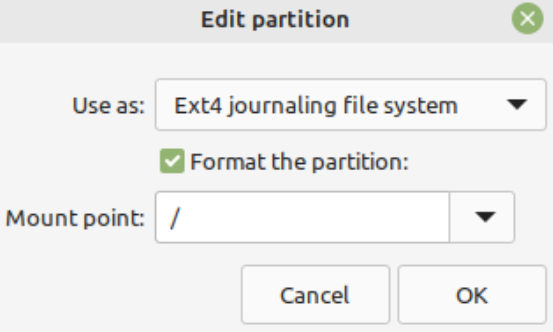
4. Root
Configure /dev/mapper/vgmint-root for installation and format the LV.
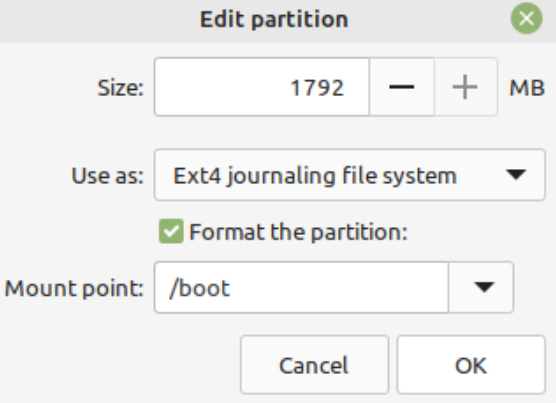
5. Boot
Configure and format /dev/vda3 as the unencrypted boot partition.

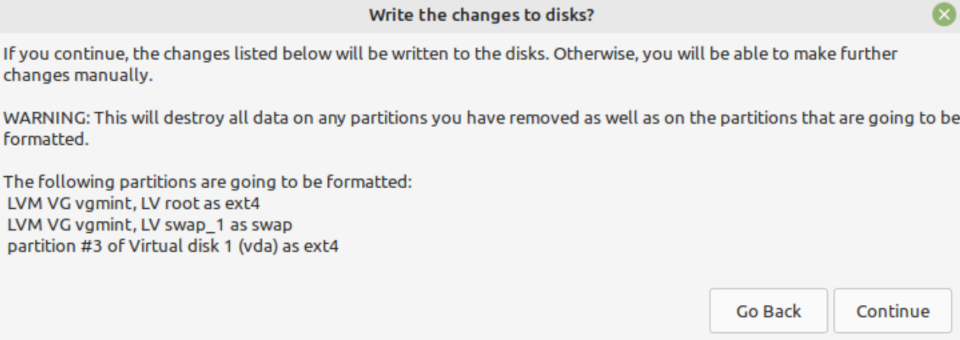
6. Write changes
Confirm that home is skipped and left unmentioned, then save changes to disk.
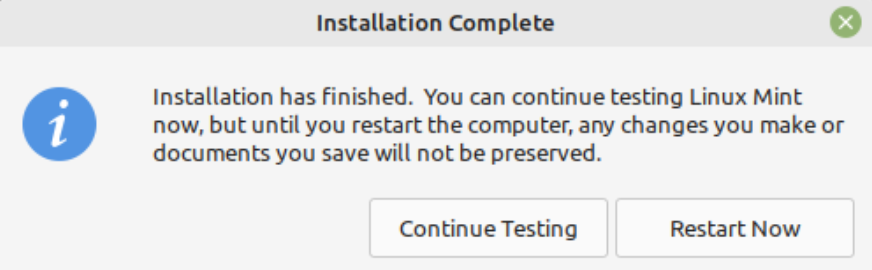
Proceed with the rest of the install as per normal.
When the Mint installer finishes, select Continue Testing.
7. Mount
Switch back to the terminal and mount file systems ...
mount /dev/mapper/vgmint-root /mnt/
mount /dev/vda3 /mnt/boot/
mount --rbind /dev/ /mnt/dev/
mount --rbind /sys/ /mnt/sys/
mount --rbind /run/ /mnt/run/
mount --rbind /proc/ /mnt/proc/
8. Chroot
chroot /mnt /bin/bash -l9. Crypttab
User will be prompted at boot to enter the existing passphrase that unlocks the encrypted LUKS partition.
Create /etc/crypttab (for our example LUKS partition vda4) ...
LUKSPART=vda4
UUID=$(blkid -s UUID -o value /dev/${LUKSPART})
echo "${LUKSPART}_crypt UUID=${UUID} none luks,discard" > /etc/crypttab
10. Initramfs
update-initramfs -u -k all11. Finish
Exit the chroot ...
exitUnmount ...
umount -l /mntDeactivate swap and volume group ...
swapoff -a
lvchange -an vgmint
Remove the encrypted device mapping (example: vda4_crypt) ...
cryptsetup close vda4_cryptClose terminal and reboot!
Helpful: ubiquity does not support existing LUKS encrypted partitions
» Next: VirtualBox on Linux Mint 21.1
« Previous: Install Linux Mint 21.1 with Custom LVM on LUKS